Invite students to join your course
Instructors can add and invite students to their Summations course through the 'Students' tab within the course. They can also monitor enrollment statuses in the 'Students' tab to track each student's level of access to the course.
There are two ways to invite students to join your course on Summations:
Invite Students to Join Your Course via Email Invitation
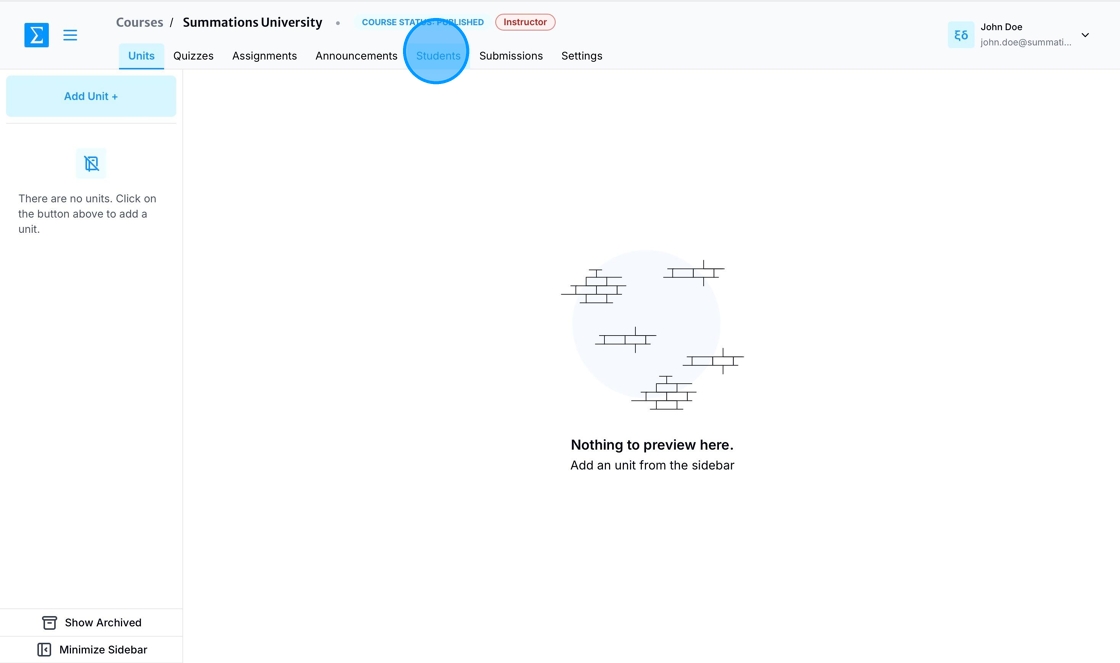
To invite students, navigate to your course and click 'Students.'
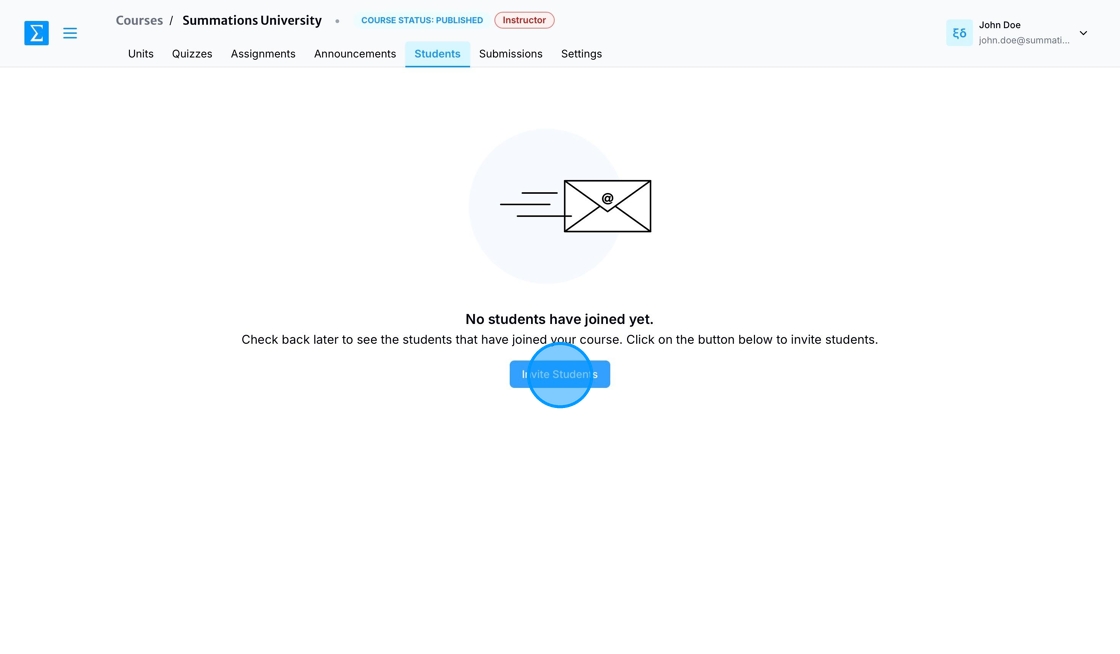
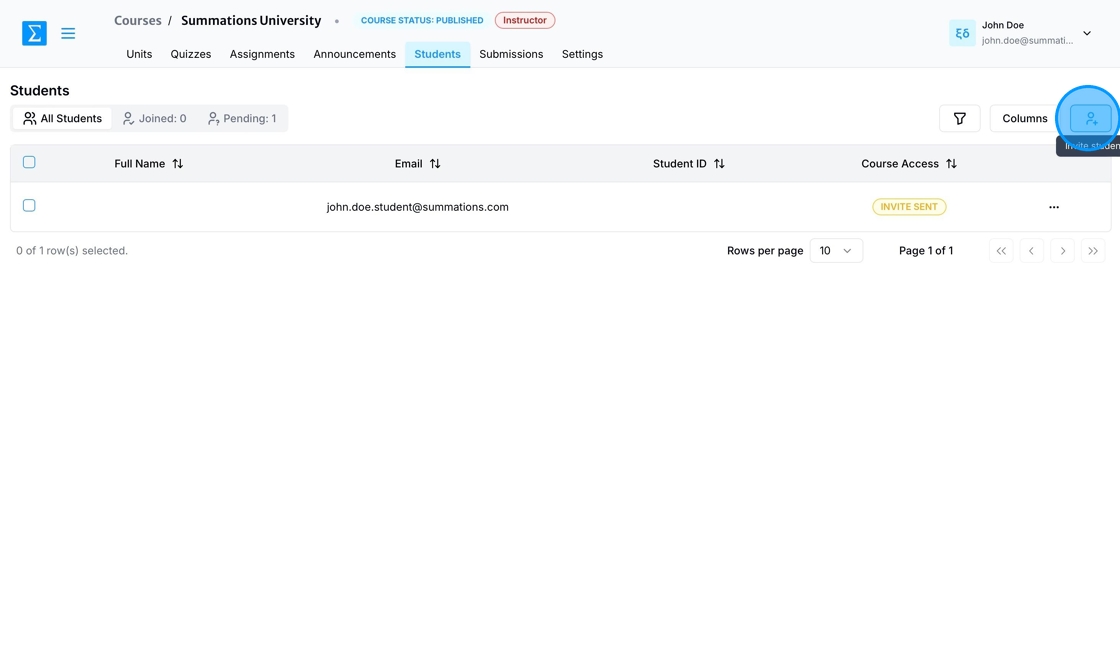
Click 'Invite Students.'
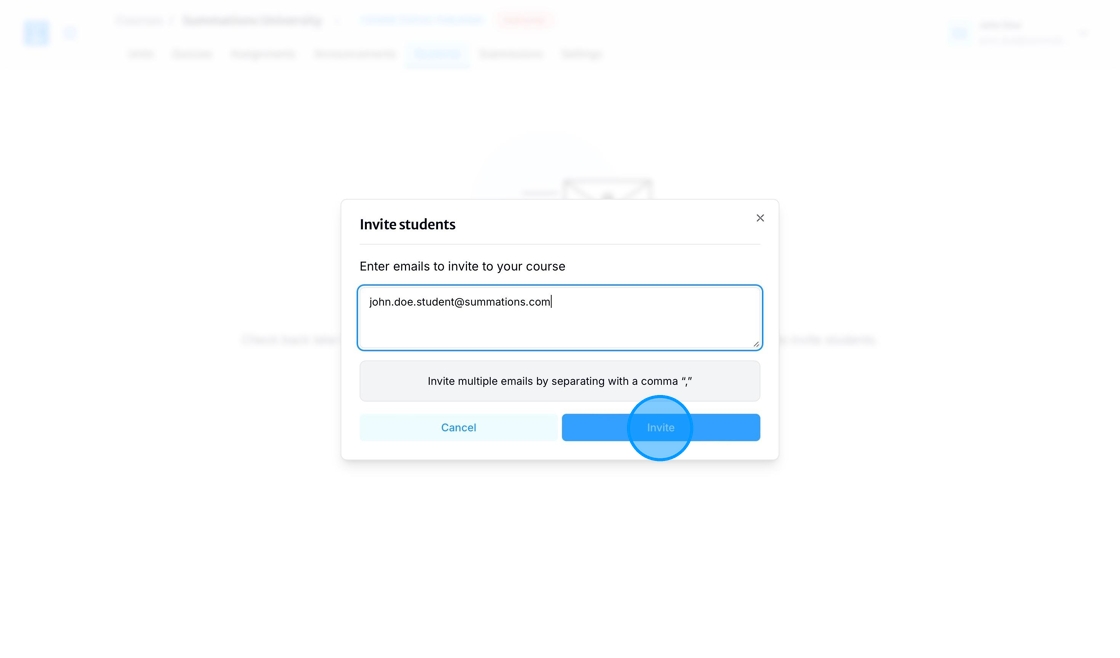
Enter your student's email address and click 'Invite.' This will automatically send an invitation email to the student.
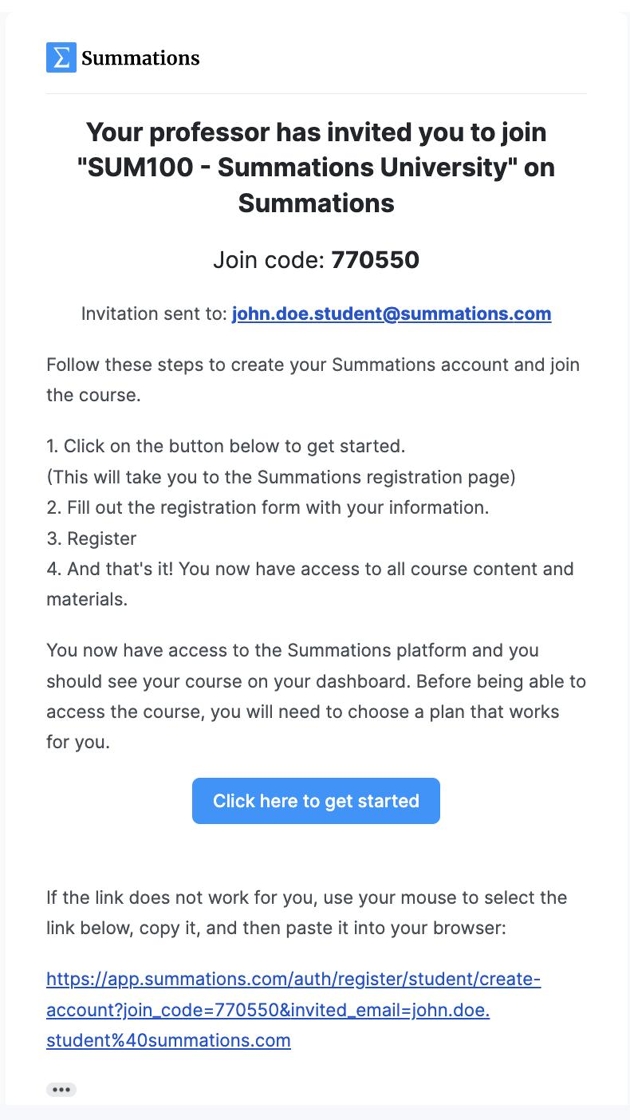
Your student will receive an invitation email in their university inbox that looks like this. The email contains detailed instructions on how to join the course and set up a Summations account.
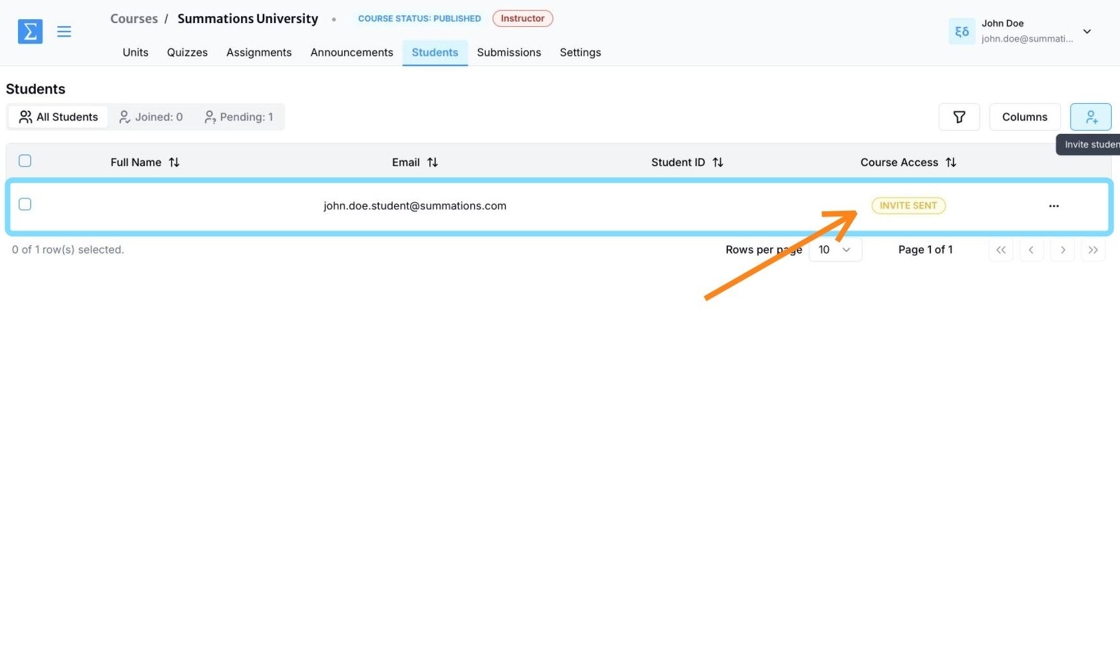
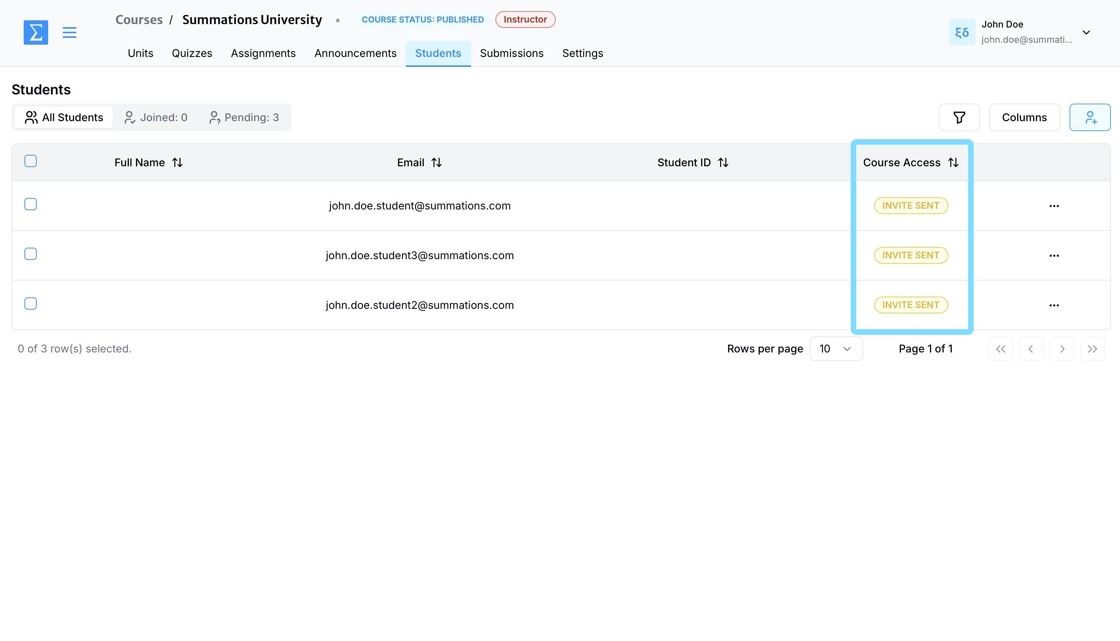
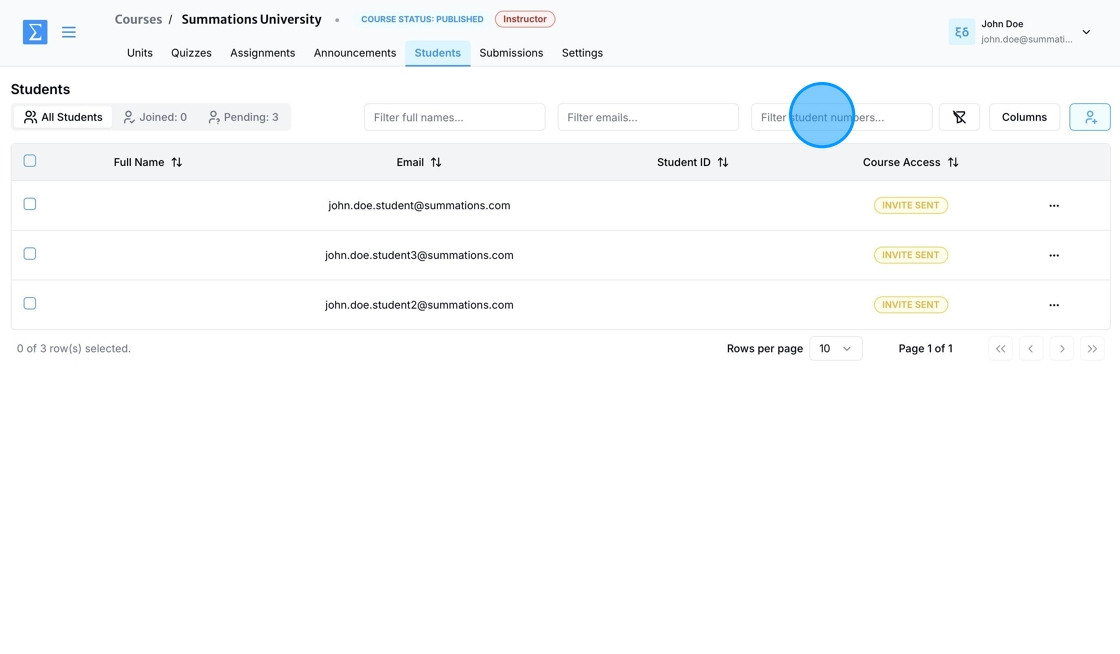
Your invited student will be listed under 'Students.' Initially, their status will show as 'Invite Sent.' Once the student accepts the invitation and joins the course, their status will change to 'Joined.'
To invite multiple students or an entire list of students at once, click on 'Invite Students.'
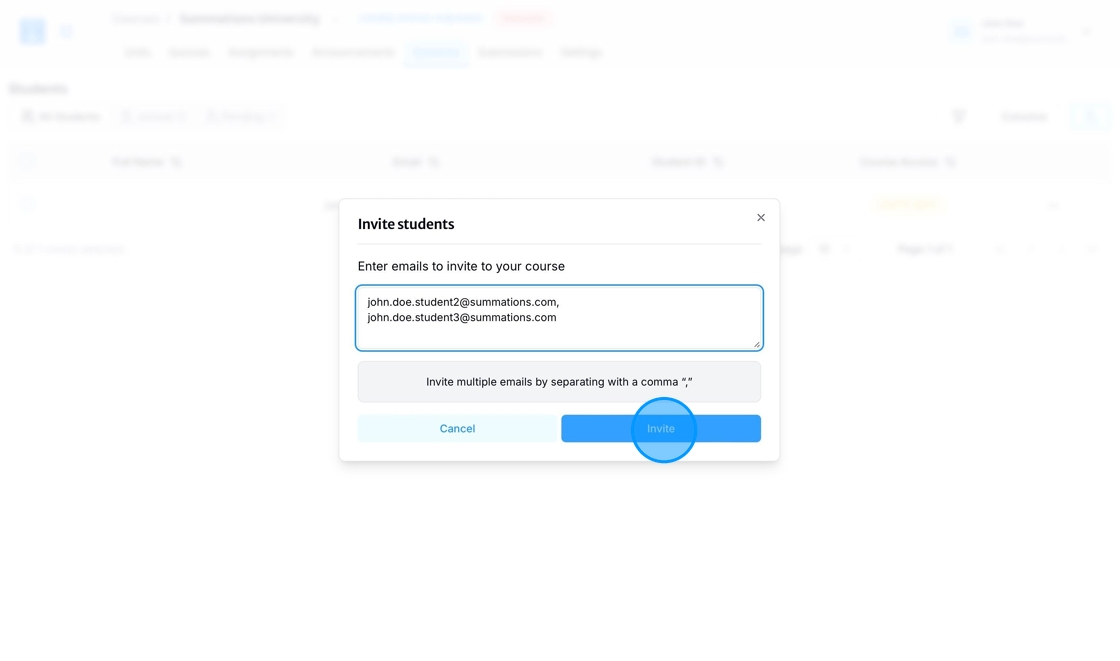
Type or paste your students' email addresses into the text box, separating each with a comma. Click 'Invite' to automatically send an invitation email to all the listed students.
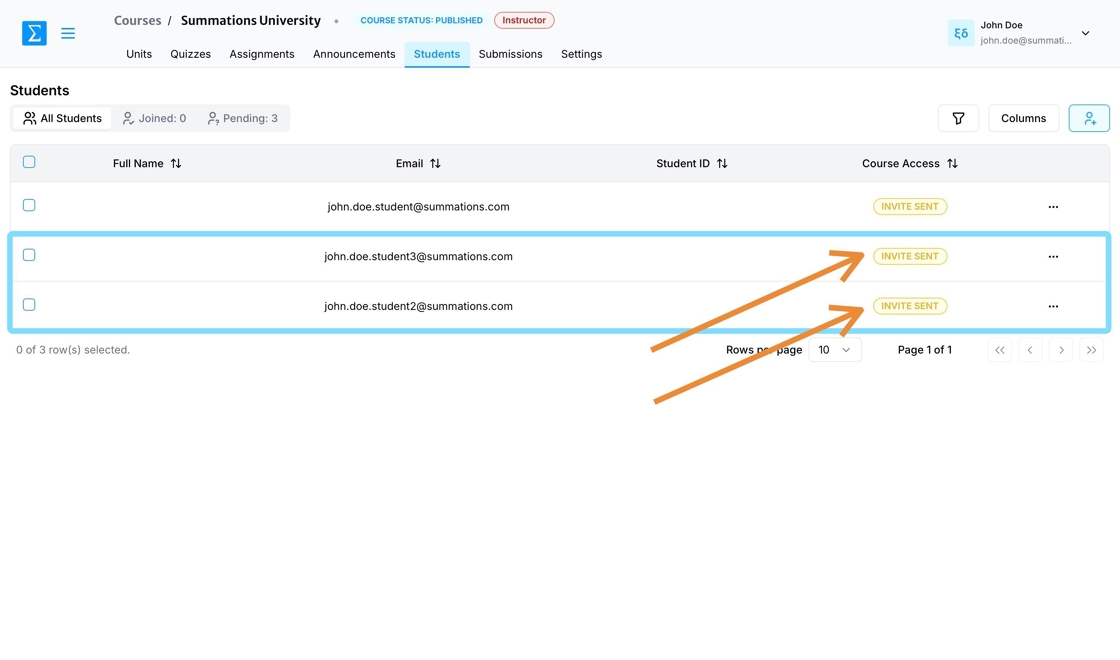
Your invited students will be listed under the 'Students' tab. Initially, their status will show as 'Invite Sent.' Once a student accepts the invitation and joins the course, their status will change to 'Joined.'
For further assistance or more information on helping your students access their course on Summations, please refer them to the Student Get Started Guide.
Invite students to join your course with a unique join code
On your course dashboard, under the course name and next to the instructor's name, you’ll find a unique 6-digit identifier called the join code. Share this code with your students to enable them to enroll in your course without an email invitation. We recommend including the join code in your syllabus, course website, or other class communications for easy access.
Once students are enrolled in your Summations course, they will no longer need the join code. It is only required for locating and enrolling in your course at the beginning of the semester.
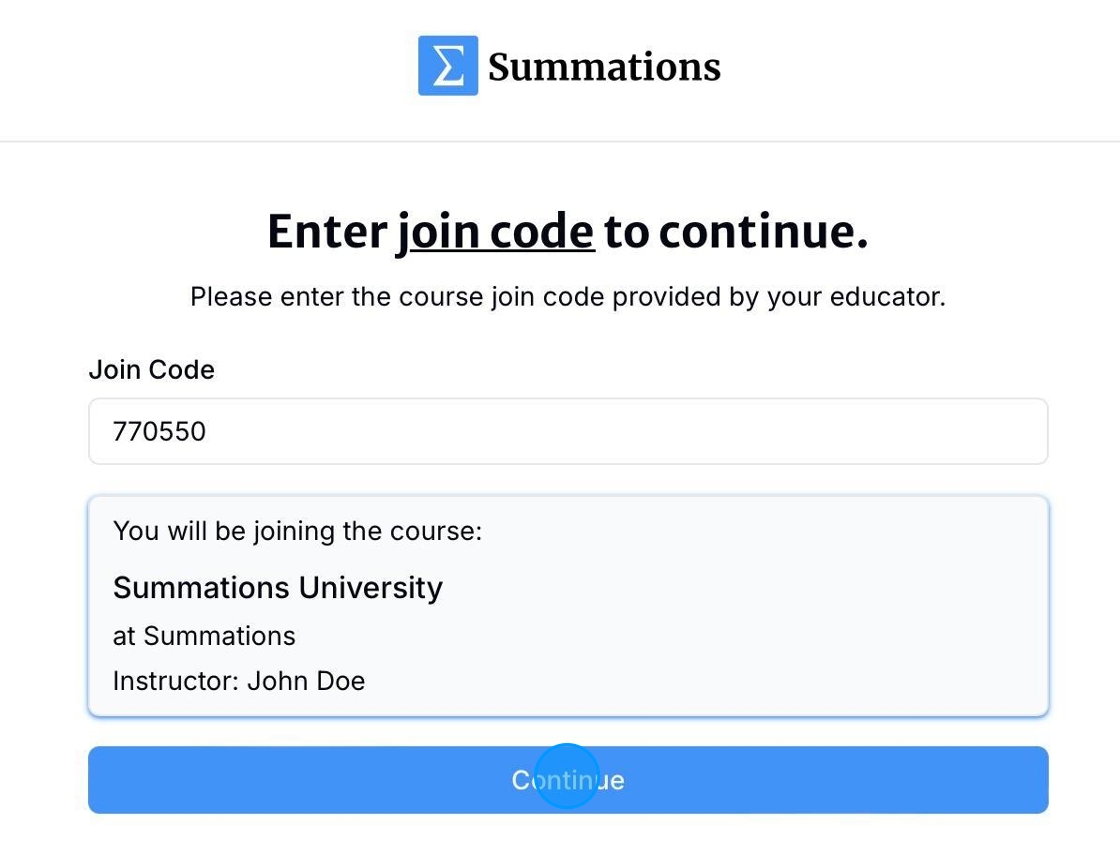
When students register for Summations or sign in, they can search for your course using the provided join code, as illustrated below:
As part of course onboarding, we will provide your students with a syllabus insert and a document titled 'Course Code: Student Join Instructions.' For further assistance or more information on helping your students access their course on Summations, please refer them to the Student Get Started Guide.
Enrollment Status
The status of each student's enrollment is displayed on the right side of the screen under the 'Students' tab. Initially, when the invitation email is sent, the status will show as 'Invite Sent.' Once the student joins your course, the status will update to 'Joined.'
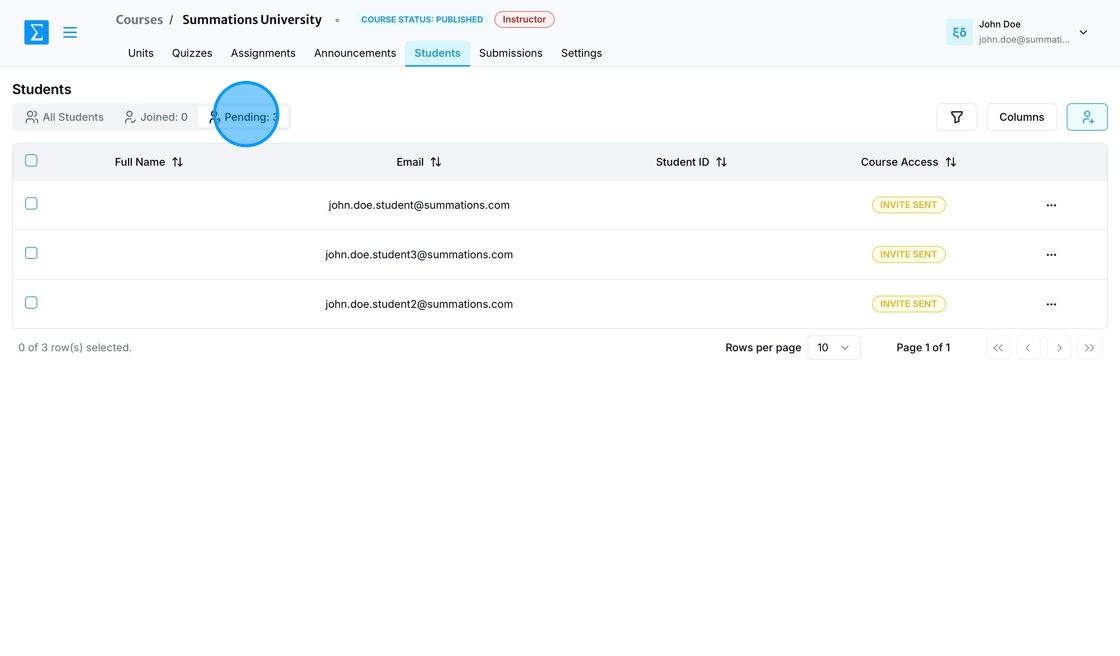
You can also check a student's enrollment status under the 'Joined vs. Pending' tab. The 'Pending' section lists all students who have been invited but have not yet joined the course.
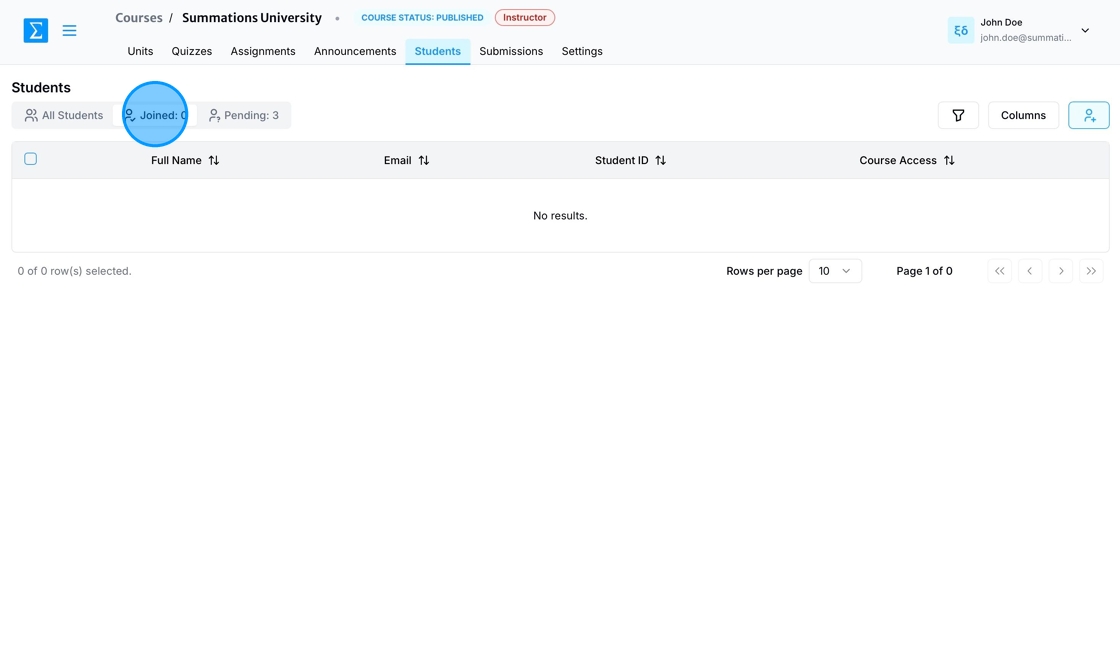
'Joined' displays all the students who are currently enrolled in the course.
Removing Students
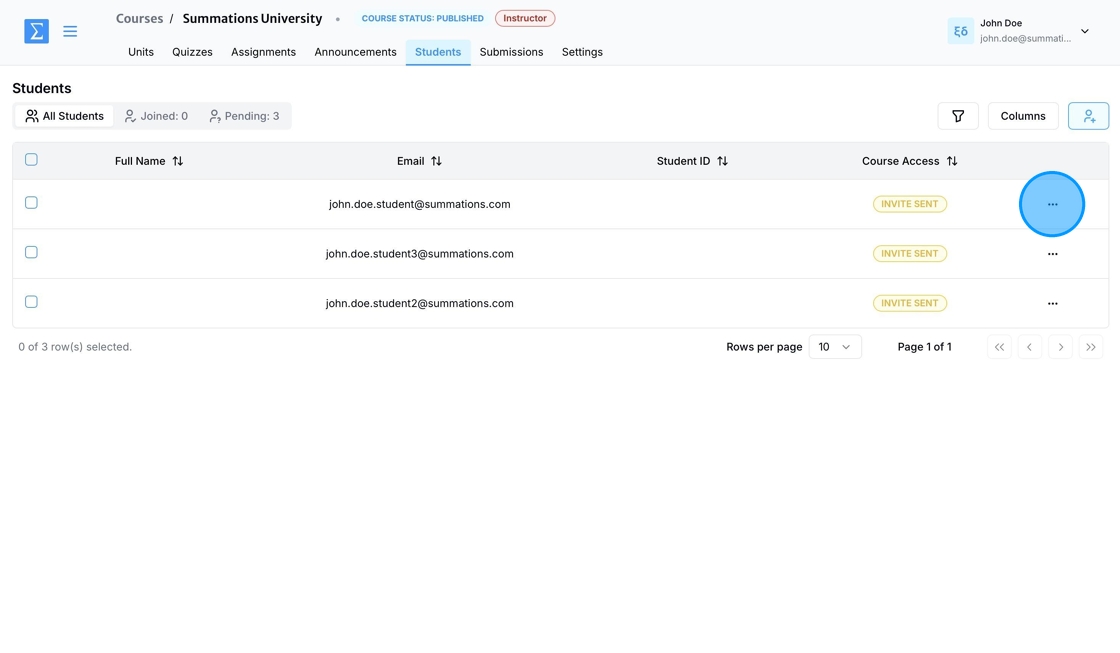
To remove a student from your Summations course, click the three dots next to their name in the 'Students' tab and select the 'Remove Student' option under 'Actions.'
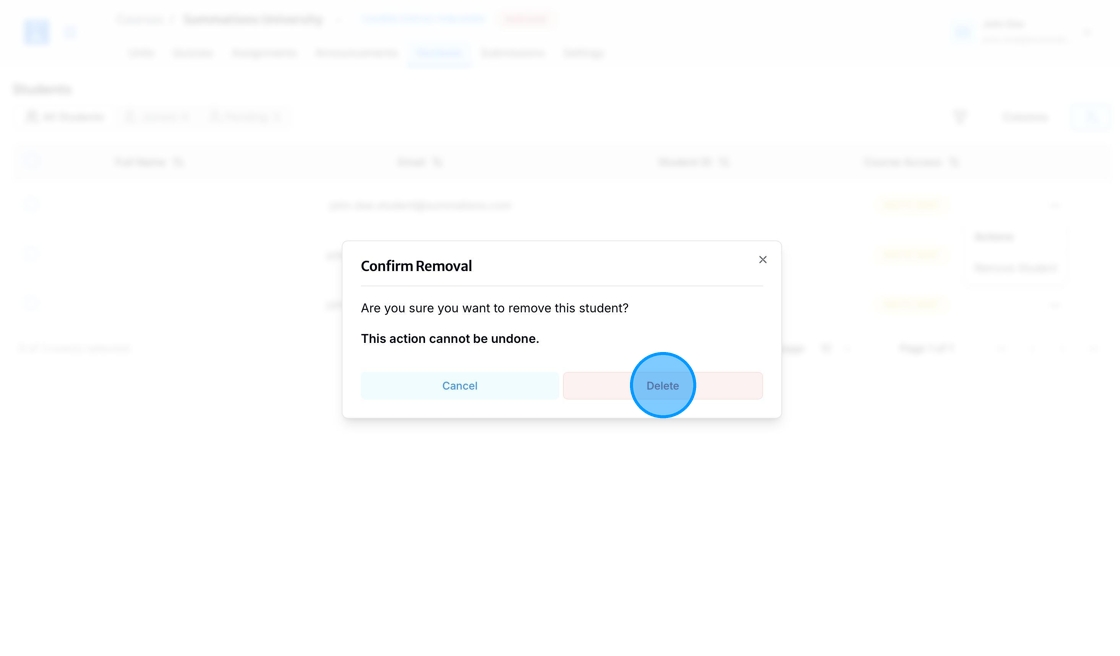
A confirmation popup will appear to ensure your action is intentional. You will be asked to confirm whether you want to proceed with removing the student from the course. Once you click 'Delete,' the student will be removed, and their access to the course materials will be revoked.
Filtering Students
Filtering students makes it easy to sort and manage your course roster, allowing you to check individual students' access to the course. You can filter students by various criteria, such as name, email, or student number. This feature streamlines tasks like identifying students who have not yet joined the course.
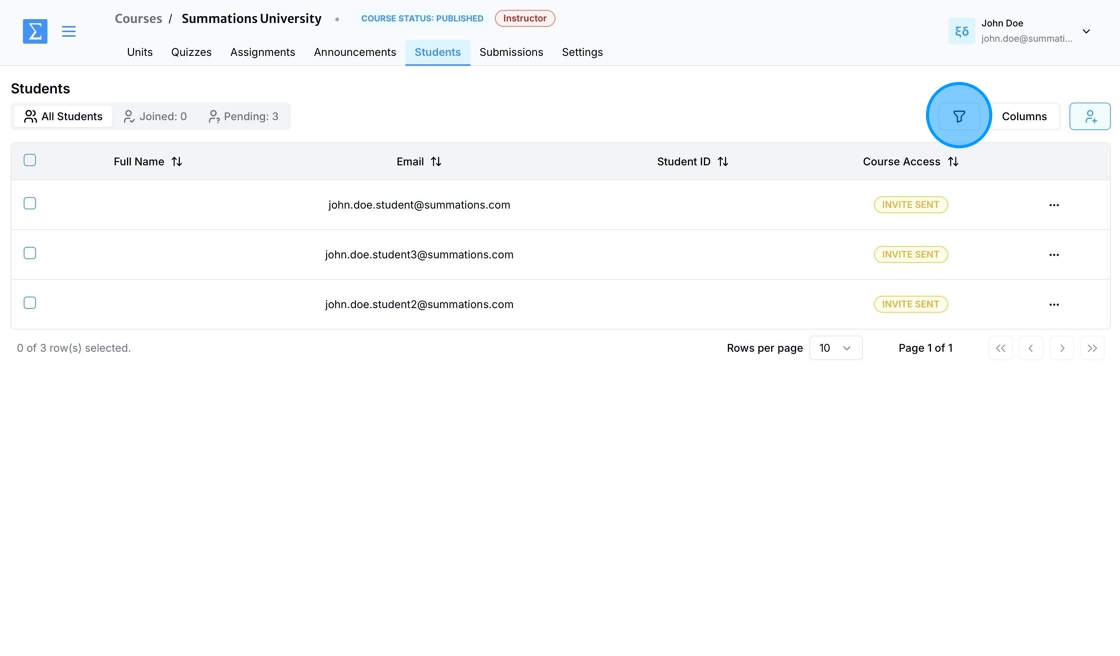
To filter students, start by clicking on 'Show Search Filter' icon.
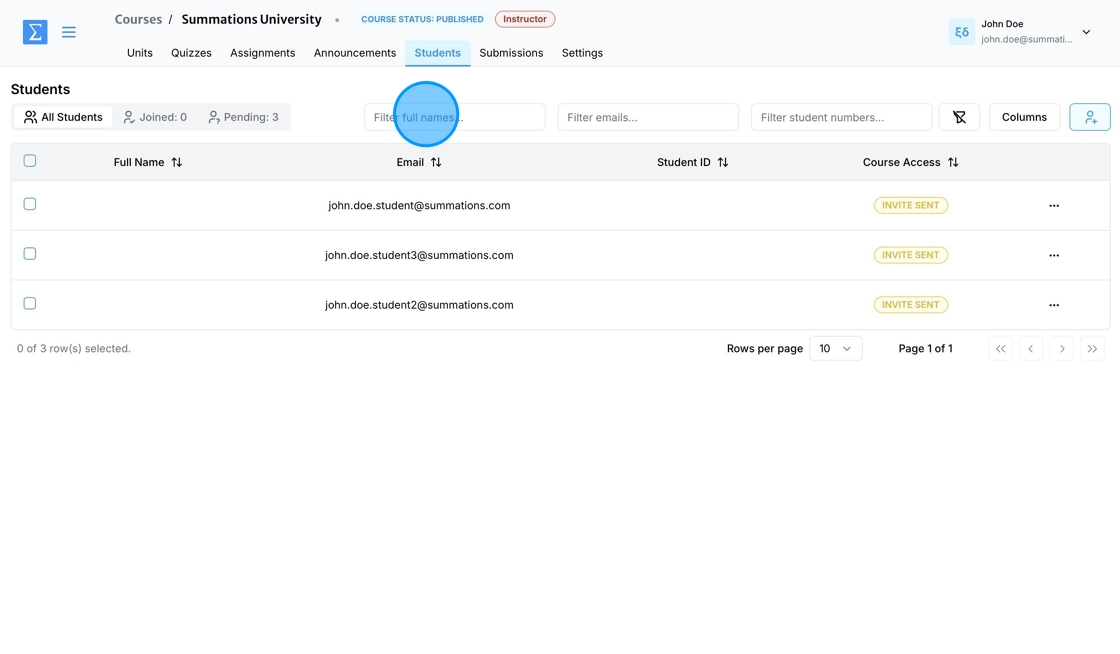
To filter by student name, enter the student's full name in the provided field:
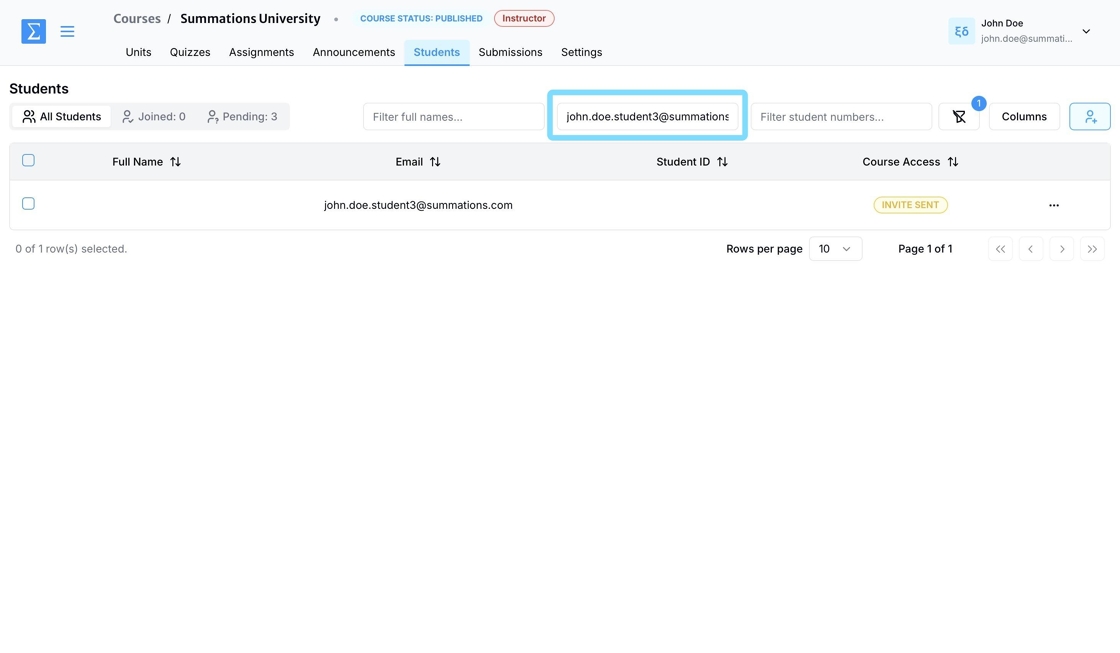
To filter by student email, enter the student's university email address in the designated field:
To filter by student number, enter the student's number in the designated field:
Managing Students
Student with Multiple Accounts
In some cases, a student may mistakenly create a second Summations account using a different email address after initially creating an account with their school email (the one used for the invitation). If this happens, follow these steps:
No Grades on the Second Account:
If the account associated with the student's second email has no recorded grades, delete that account from your Students tab. Instruct the student to sign back in using their school email address moving forward.
Grades on the Second Account, Name on the School Account:
If the account associated with the student's second email has grades recorded, but the account with their school email does not, delete the school email account from the Students tab. Then, instruct the student to update the email address on their non-school account to their school email via their Account Settings.
Grades on Both Accounts:
If both accounts (primary and second email) have recorded grades, Summations Support will need to merge the accounts to prevent any grade loss. Instruct the student to email support@summations.com with the 6-digit join code for the course, requesting that their accounts and grades be merged under the school email account.
Students Using Personal Email Addresses
Summations does not allow students to register with personal email addresses. Each course is tied to a specific university, and to ensure privacy and security, registration is permitted only through university email addresses. This policy safeguards both instructors and students, creating a secure and compliant learning environment.

