Settings Tab
The Settings Tab offers users a comprehensive platform to customize their course profiles, preferences, and course settings. Educators can update course information, modify course status, and manage teaching team members. Students can tailor their account settings, including notification preferences, profile visibility, and accessibility options.
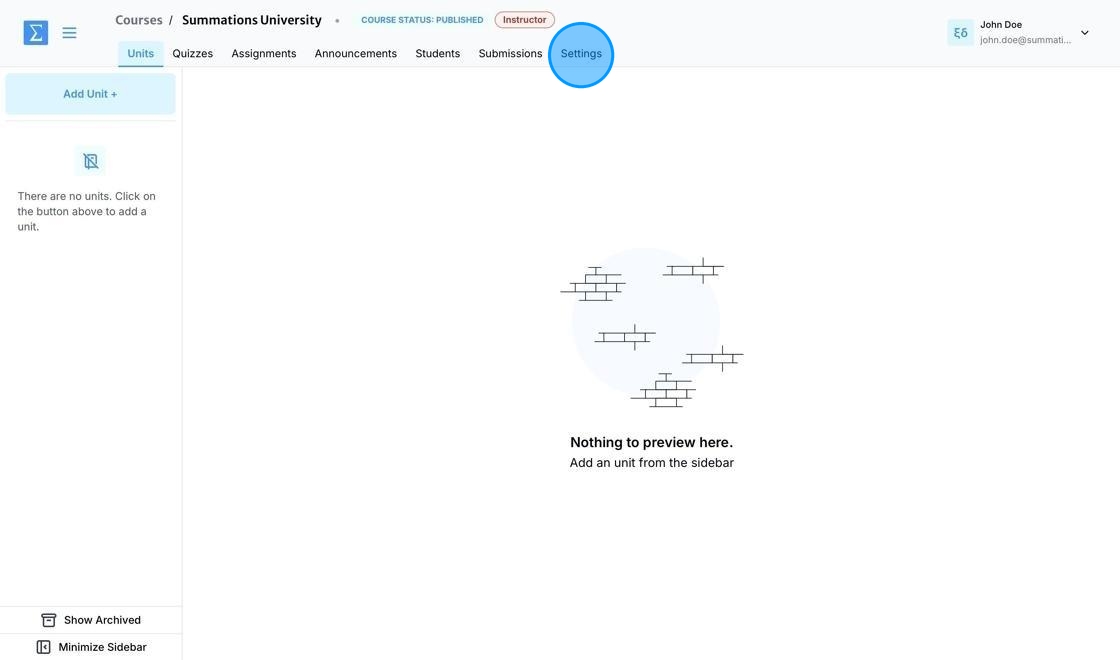
To make changes to your course, click on the 'Settings' tab.
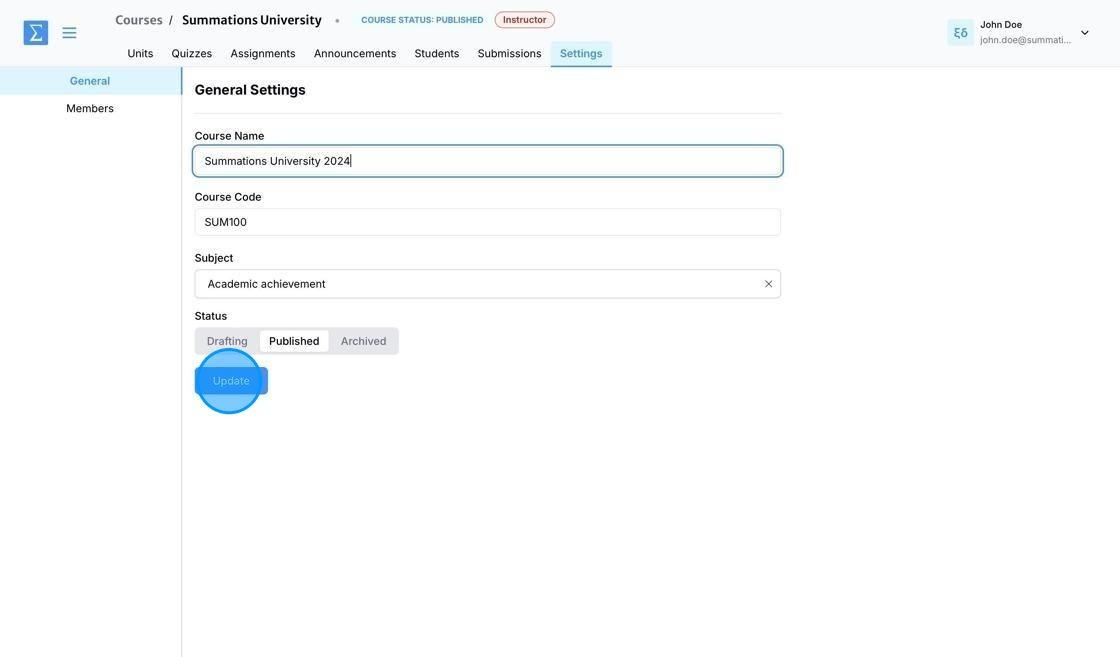
Changing the Course Name
To update the course name, navigate to the "Course Name" field under 'General', enter the new name, and click "Update" to save your changes. This allows you to ensure the course name accurately reflects the content or semester for your students.
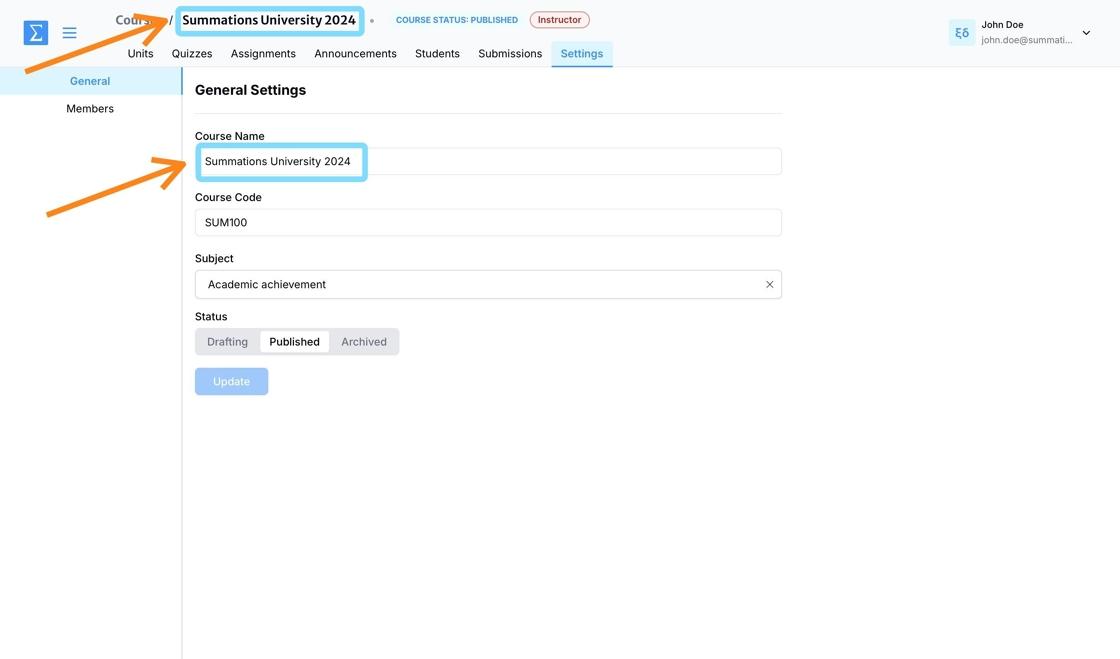
The course name has now been updated and will be visible to both educators and students.
Changing the Course Code
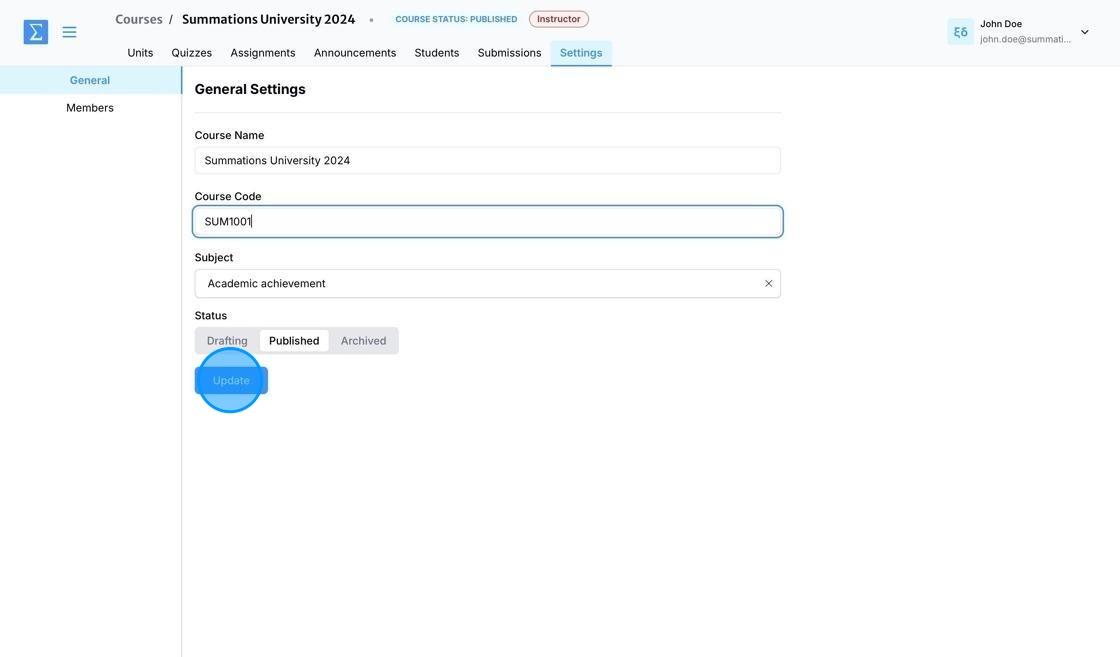
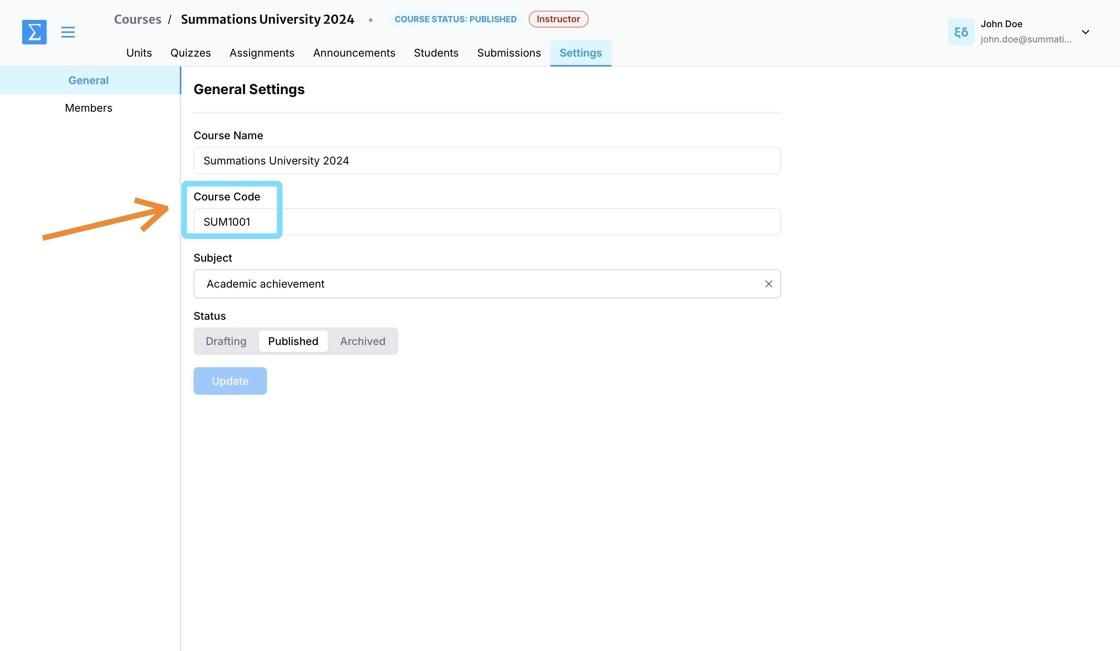
To update the course code, navigate to the "Course Code" field under 'General', enter the new code, and click "Update" to save your changes. This ensures the course code aligns with your institution’s requirements and is clear for both educators and students.
The course code has now been updated and will be visible to both educators and students.
Changing the Subject
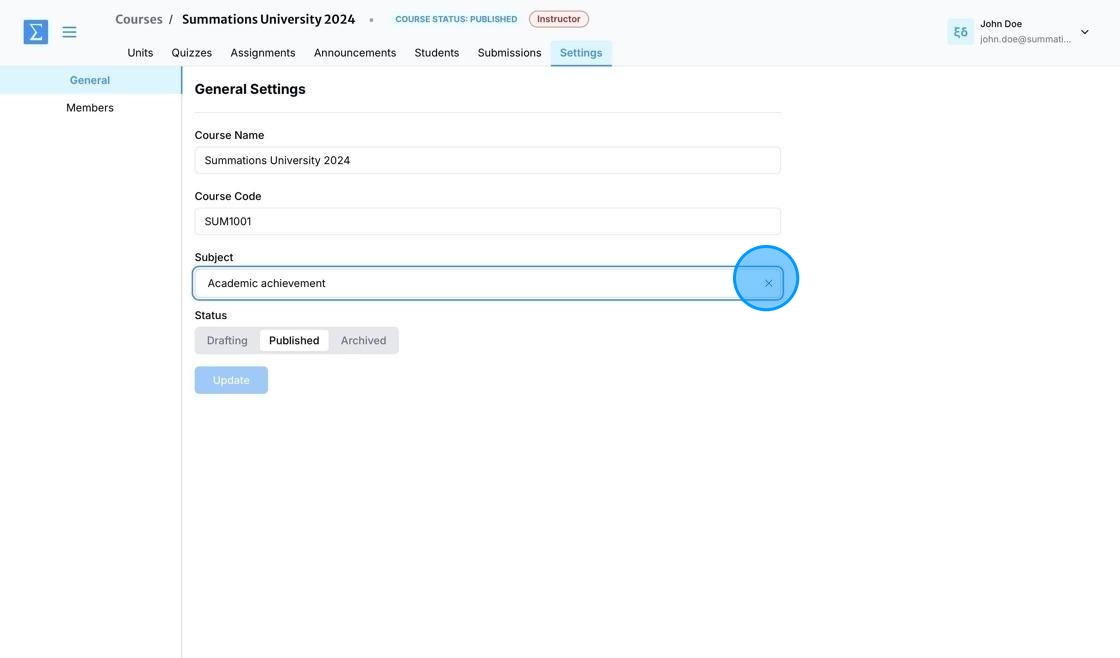
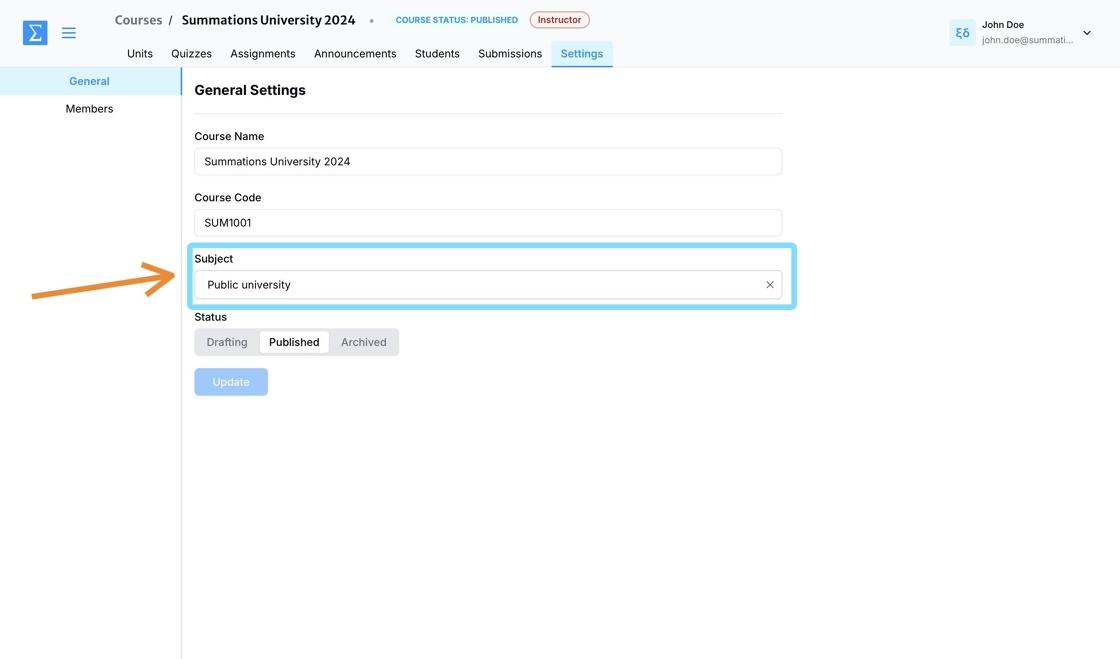
To update your course's subject, start by removing the current subject. Under the 'General' section, click the "x" located on the right side of the subject line to clear it. This step allows you to select or enter a new subject that best aligns with your course content.
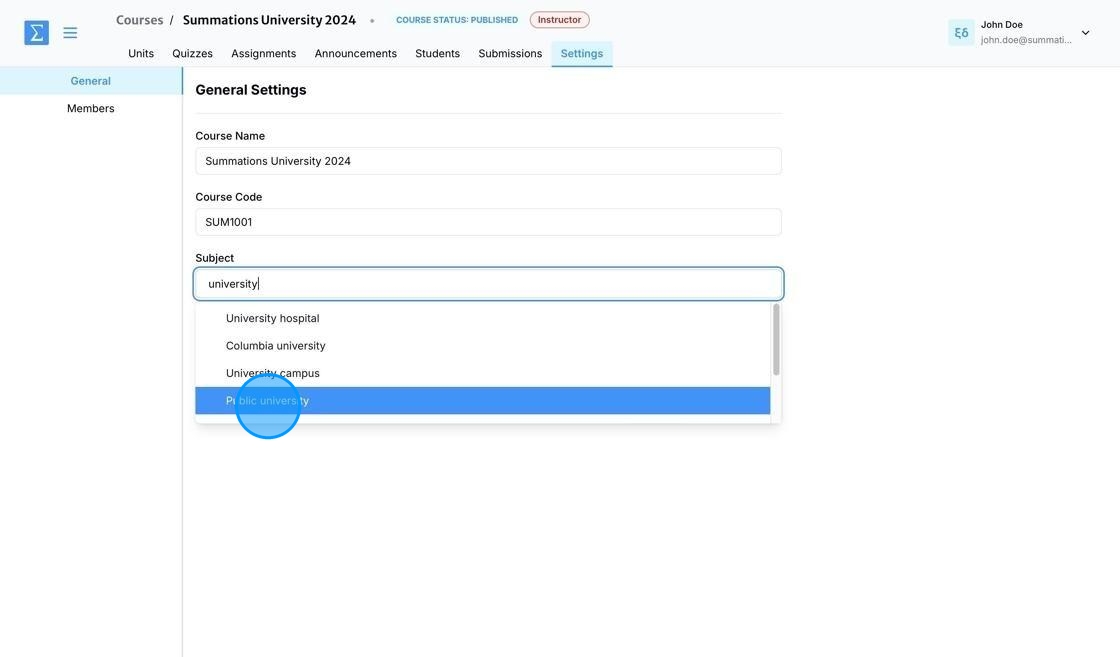
Type in the new subject and select the appropriate option from the list.
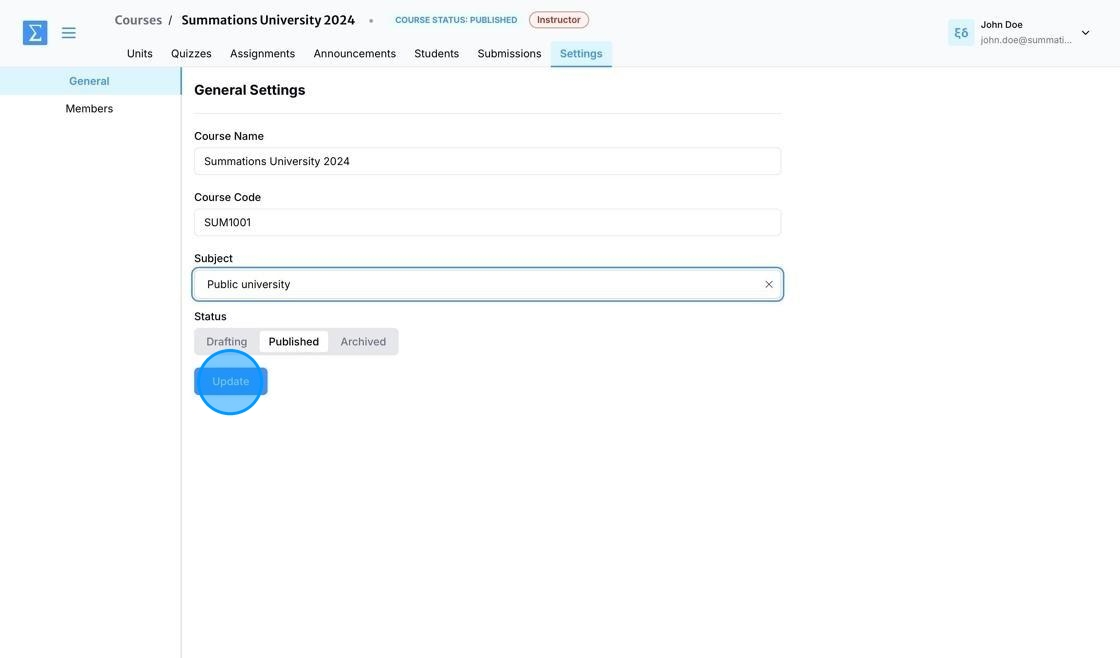
After selecting the new subject, click 'Update' to save your changes.
The course subject has been updated and is now visible to both educators and students.
Updating Course Status
On the Summations platform, you can easily manage the status of your courses to reflect their current state. Courses can be set to one of three statuses: Drafting, Published, or Archived.
Drafting: This status indicates that the course is still under development and not yet visible to students.
Published: Once you're ready to share the course materials with your students, you can set the status to Published, making it accessible for enrollment and participation.
Archived: If a course is no longer active, you can set it to Archived. This removes it from student access while retaining all course materials for your future reference.
Updating the course status ensures your content is effectively managed and visible only to the appropriate audience at the right time.
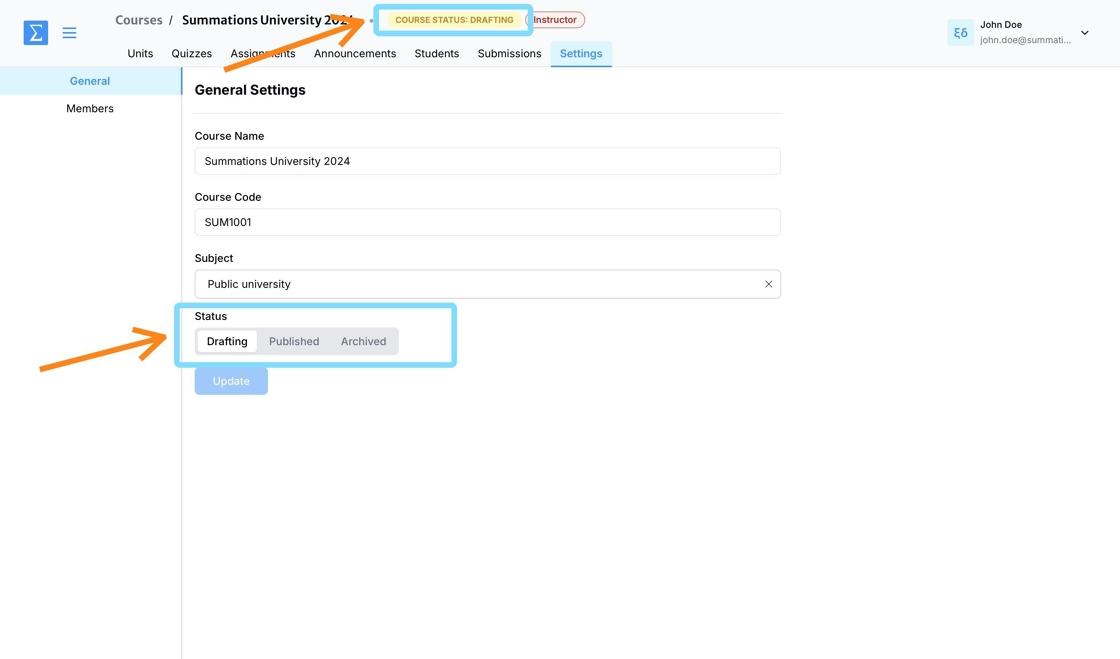
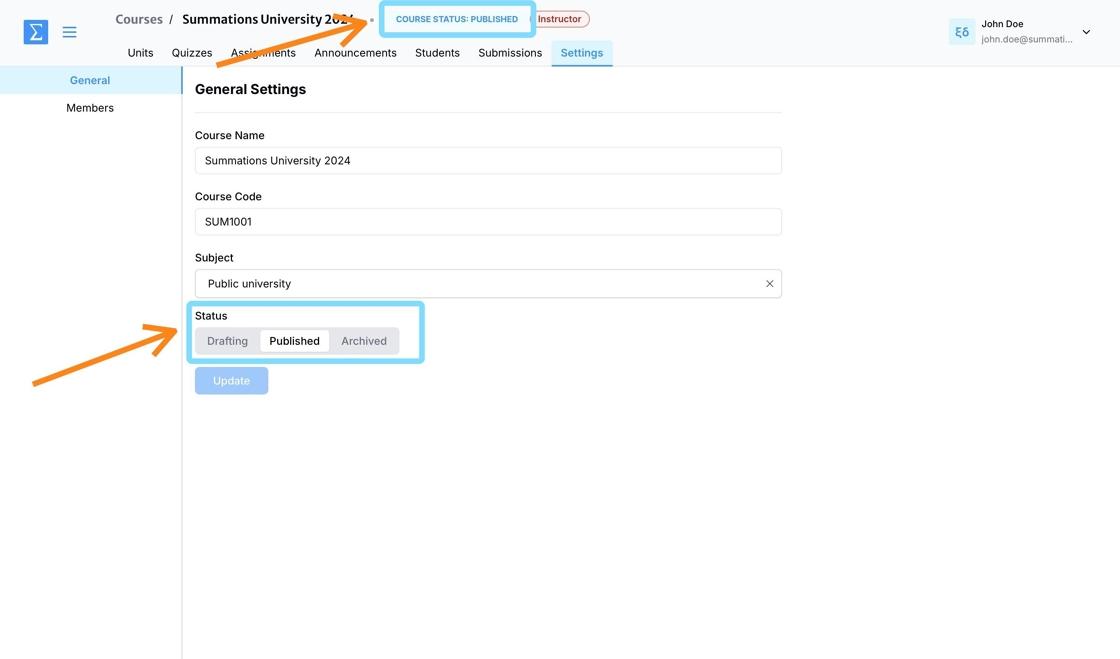
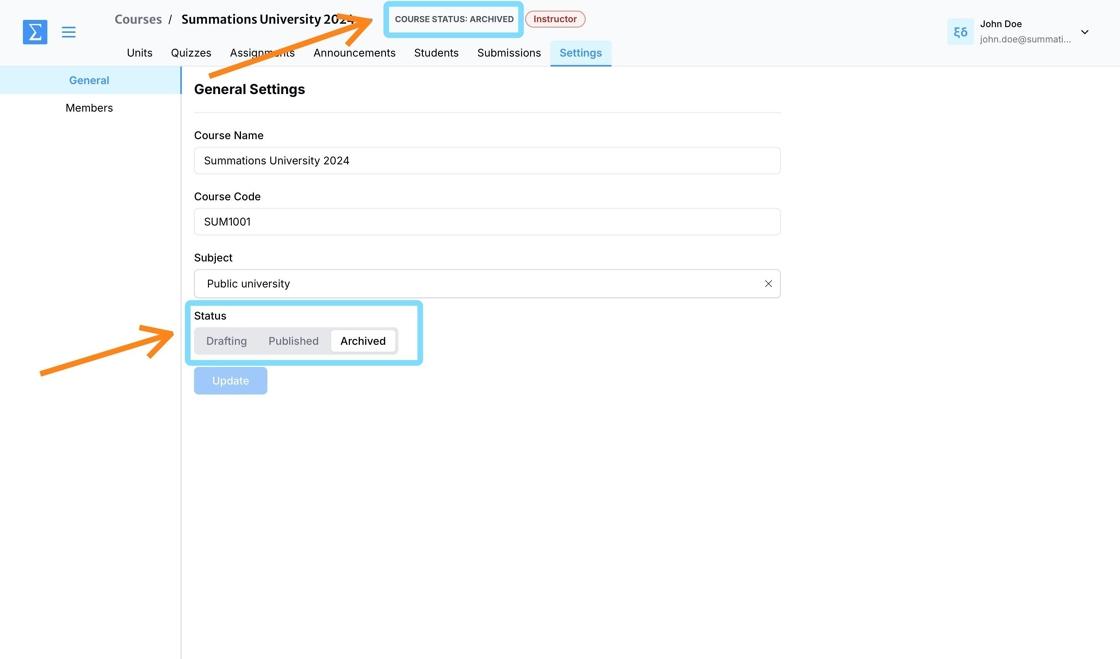
You can view the course status at the top of your course, displayed next to the course name.
Drafting
When a new course is created, the default status is set to "Drafting." However, if you were invited by a member of our team, your course may already be set to "Published."
As an instructor, you can update the course settings after joining the course. If your course is still under development and not ready for students, we recommend keeping it in "Drafting" status until all materials are finalized. This ensures the course remains hidden from students until it is fully prepared.
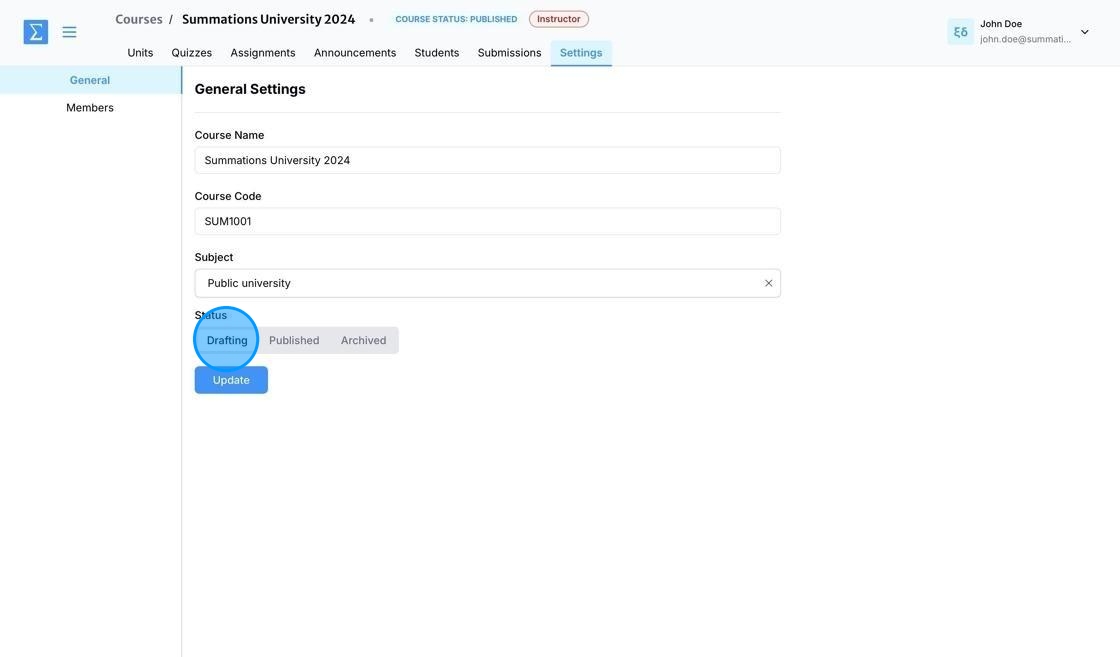
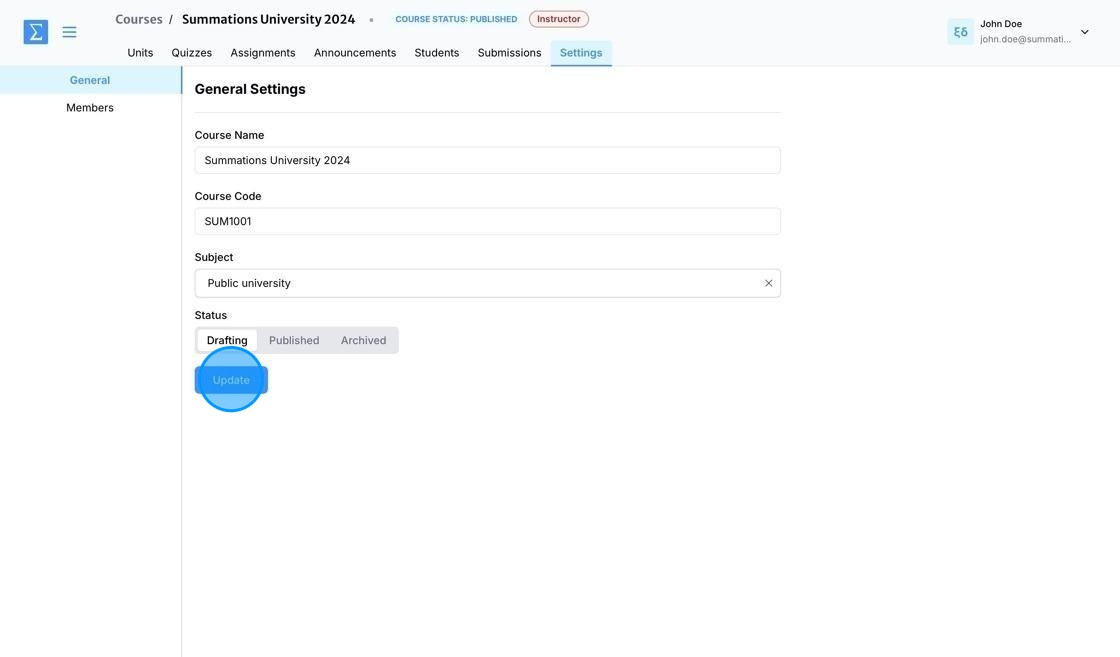
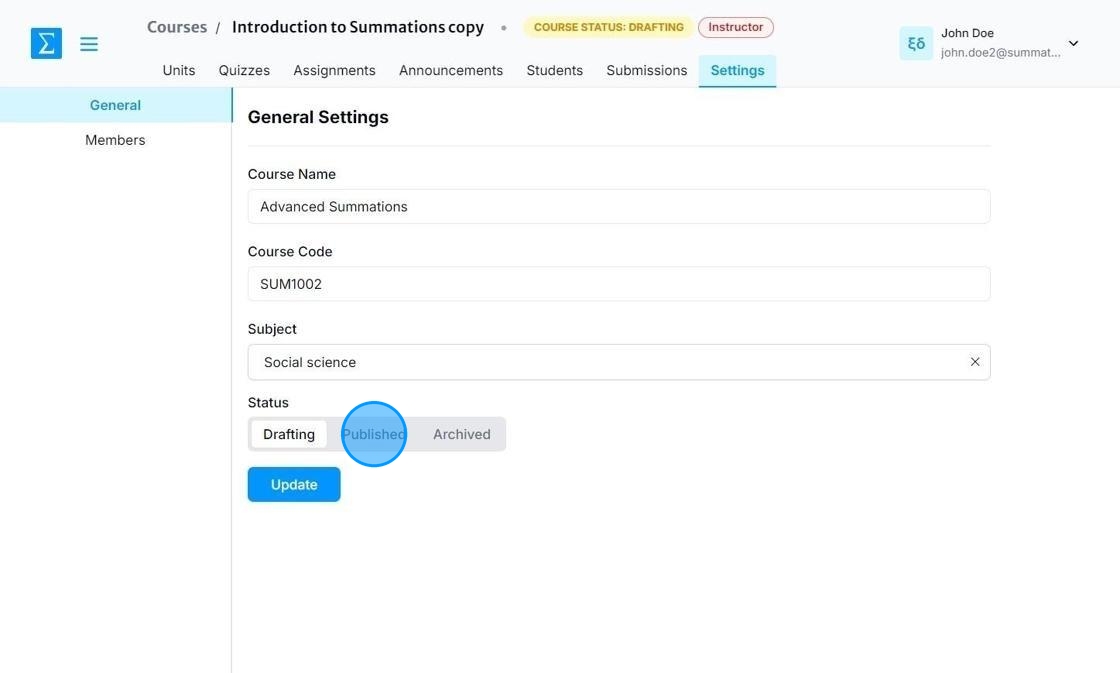
To change your course status to 'Drafting,' navigate to the Settings tab in your course, select 'Drafting' under Status, and click 'Update.
The course status has now been changed to 'Drafting,' and student access has been revoked.
Published
If your course is ready to be published, navigate to the Settings tab in your course and select 'Published' under Status.
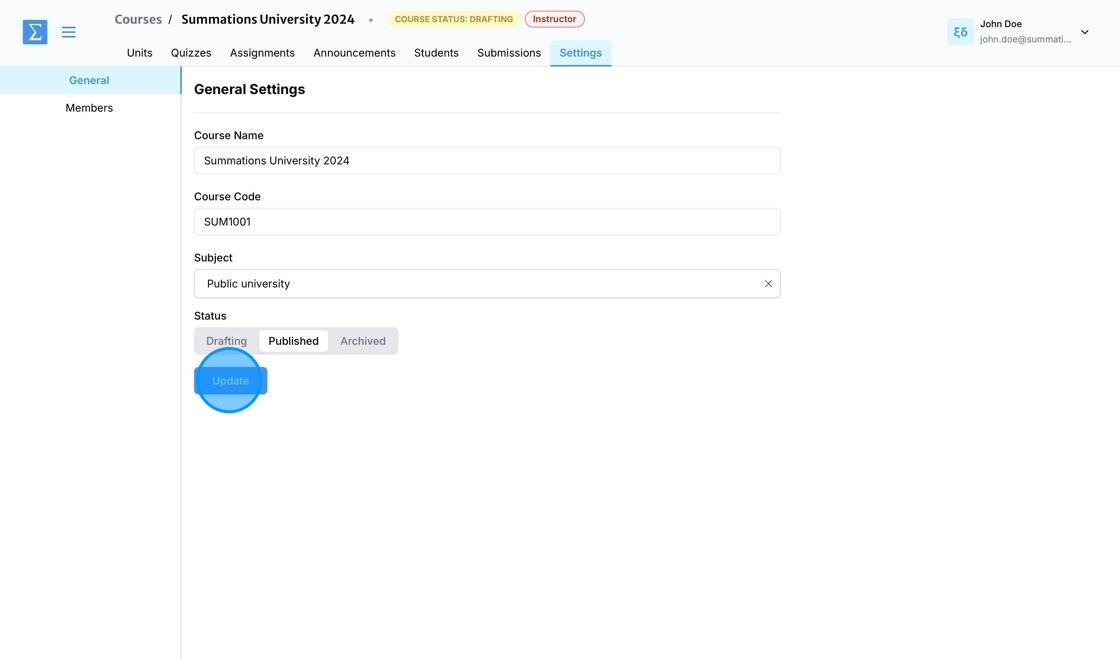
"Click 'Update' to set your course status to 'Published.
The course status has been updated to 'Published,' making the course and its assigned materials visible to your students.
Archived
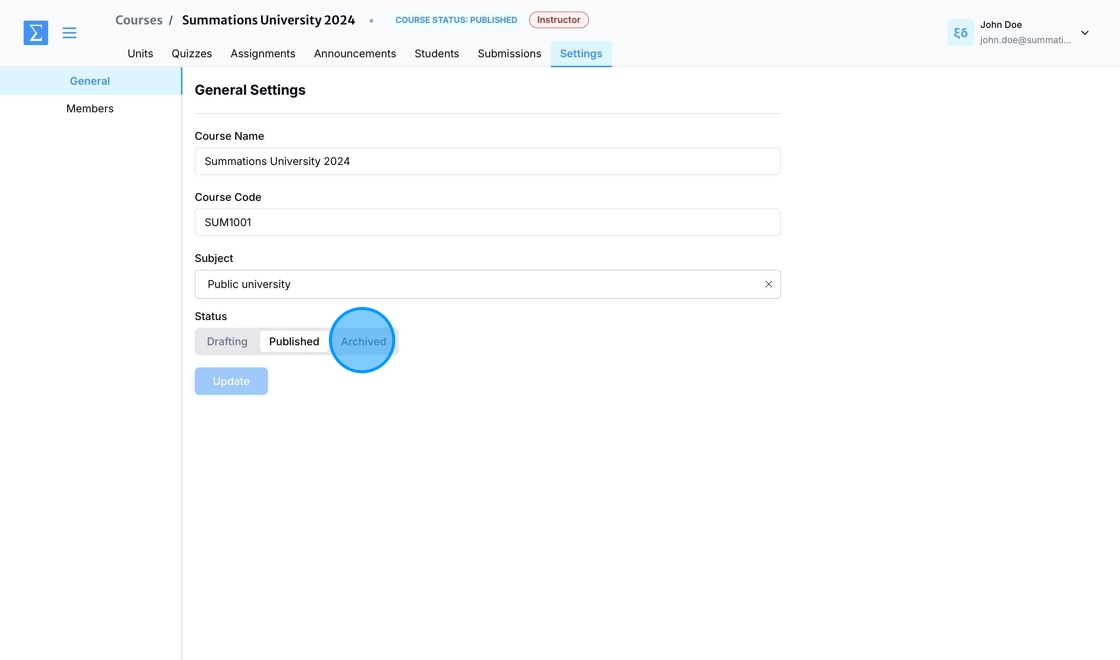
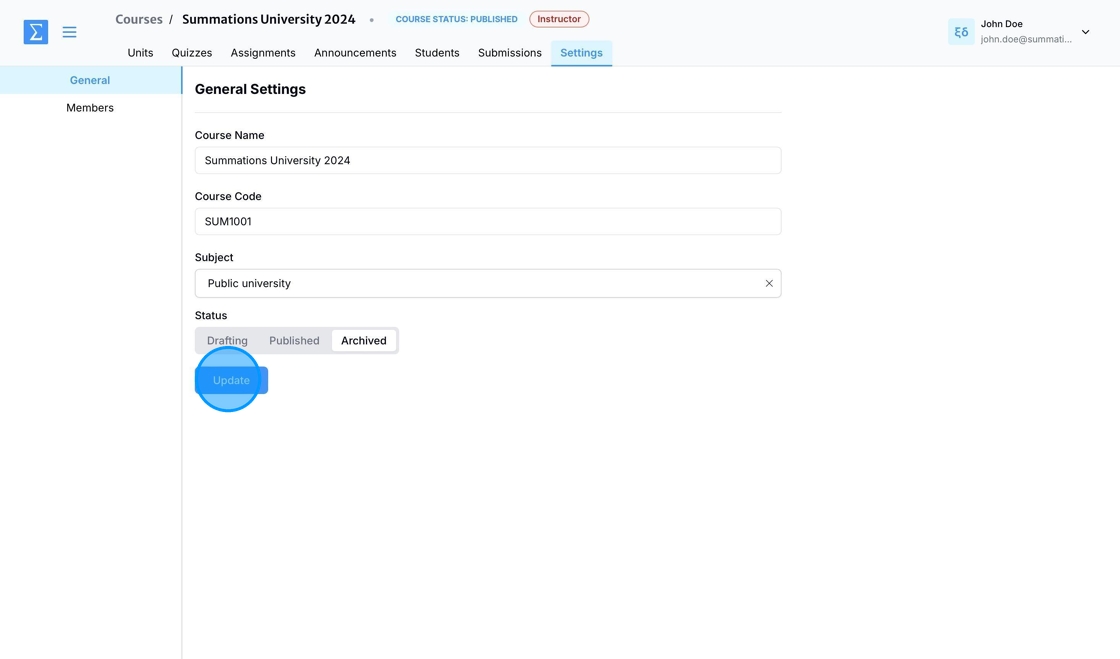
If a course is no longer needed or the semester has ended, navigate to the Settings tab in your course and select 'Archived' under Status." This action will revoke student access, hide the course from your homepage, and securely retain all materials for future reference.
Click 'Update' to set your course status to 'Archived.
The course status has been changed to 'Archived,' revoking student access and hiding the course from your homepage.
Add Co-Instructor or TA to your course
To invite or add a team member to the course in Summations, there are three pre-set roles: Instructor, Co-Instructor, and TA (Teaching Assistant). For all three pre-set roles, the invited team member must either login or register an educator account with Summations. They will be prompted to do so through the invitation email you send.
Add Instructor / Co-Instructor
An individual in the Instructor/Co-Instructor role has full control over the course and its management. They can create, edit, and delete course content, including assignments, quizzes, and modules. Instructors are responsible for managing student enrollments, tracking grades, and overseeing overall course progress. They have full access to course settings and the authority to publish or unpublish a course, making it available or unavailable to students. Additionally, instructors can add or remove users—such as co-instructors, TAs, or students—granting them the highest level of administrative access.
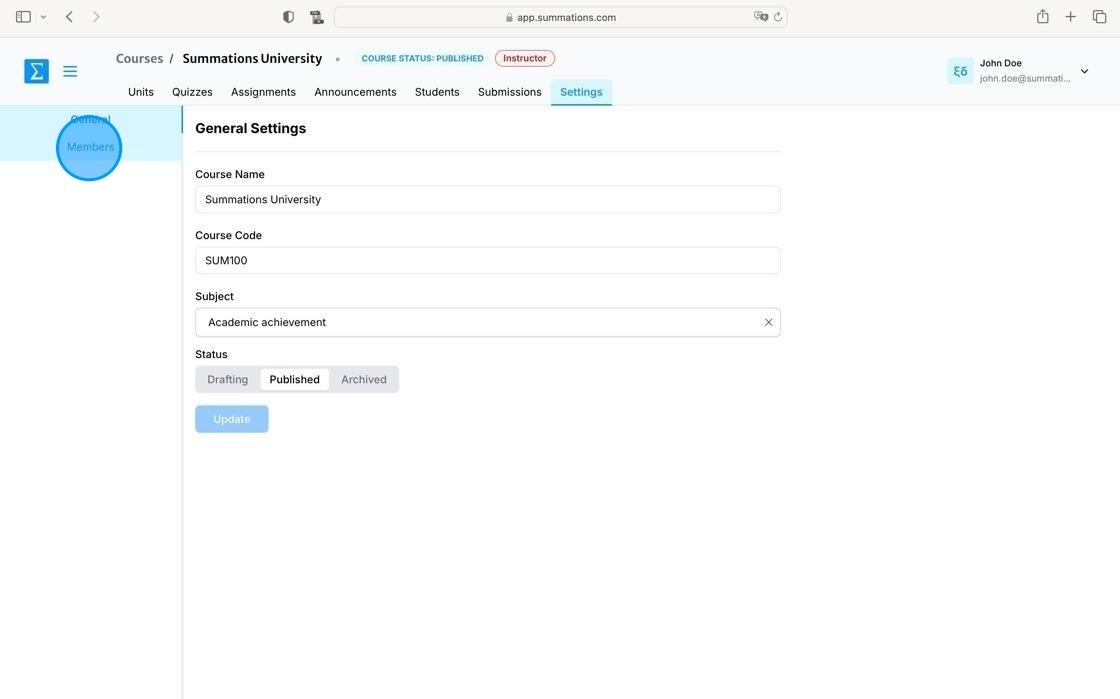
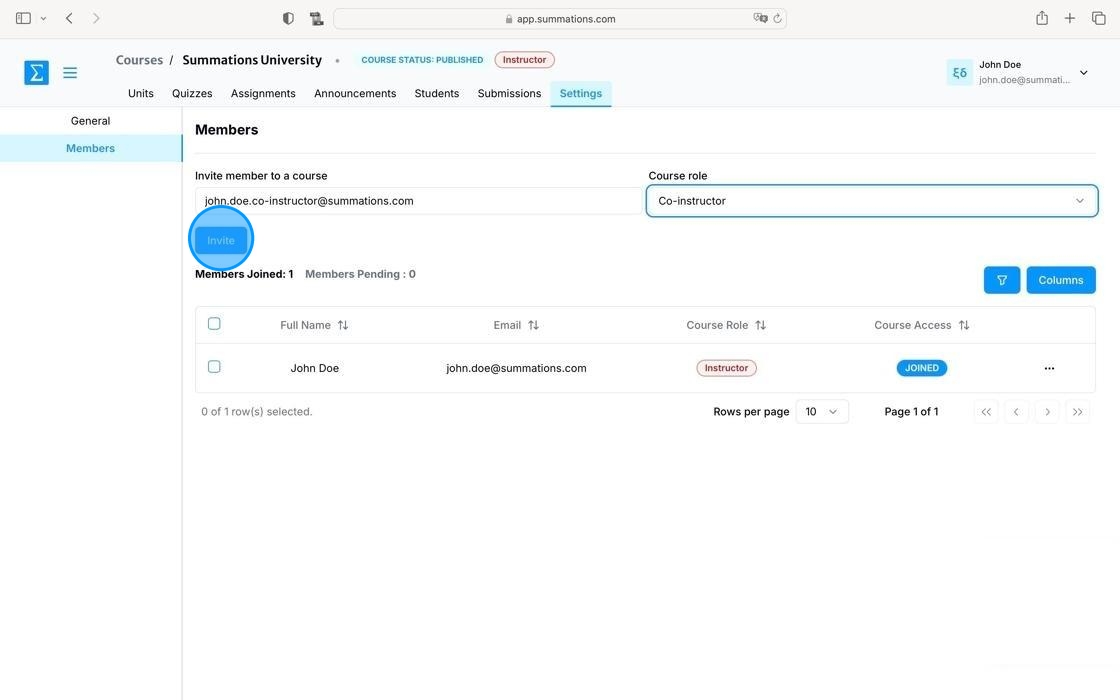
To add an instructor or co-instructor, navigate to the 'Settings' tab and select 'Members' from the sidebar.
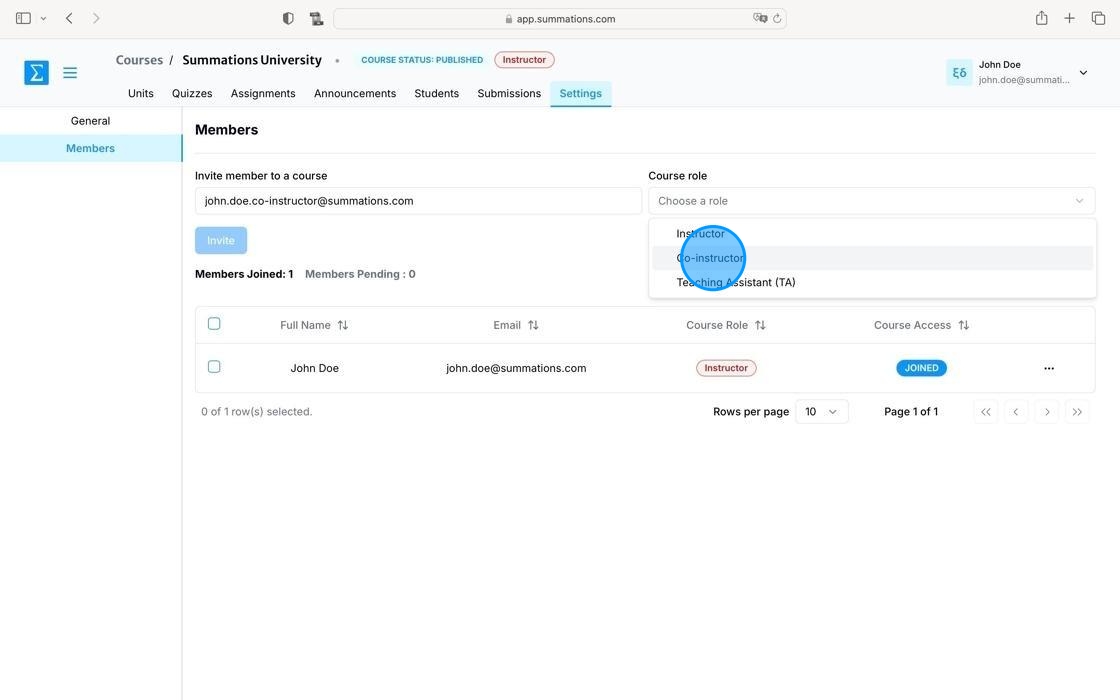
Enter your co-instructor's email and select their role as 'Co-instructor.'
Click 'Invite.' This will automatically send an invitation email to the instructor or co-instructor.
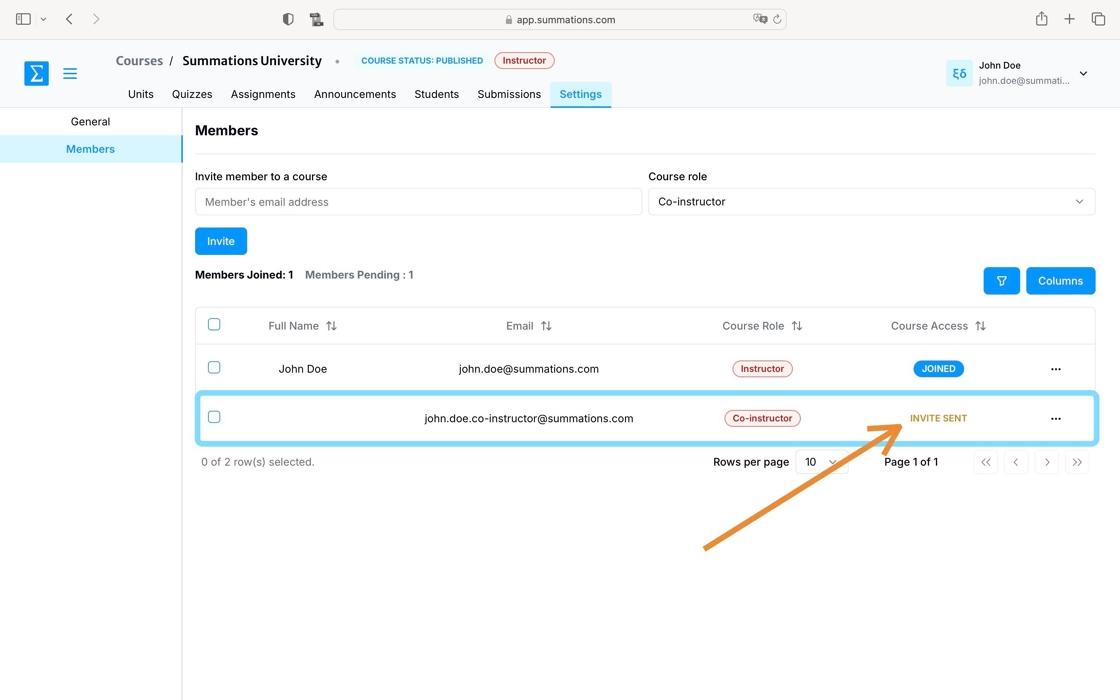
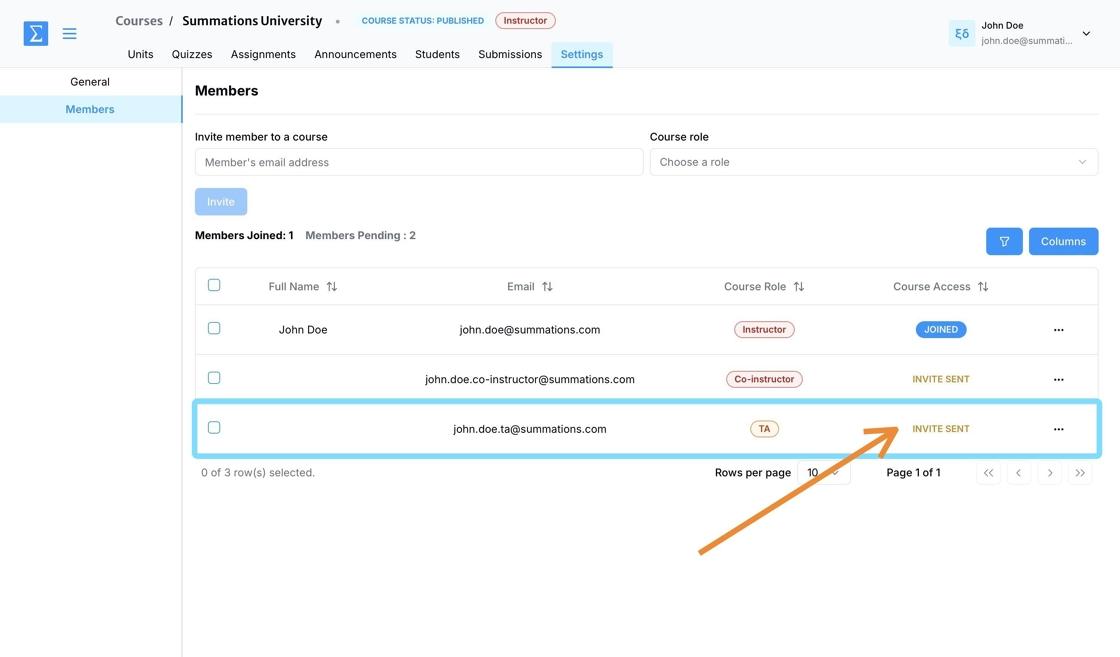
Your invited colleagues will appear listed under 'Members.' Initially, their status will display as 'Invite Sent.' Once they accept your invitation and join the course, their status will update to 'Joined.
Add TA
The TA (Teaching Assistant) role is designed to provide supportive assistance to the instructor. TAs can help by grading assignments, managing submissions, and providing feedback to students. They can view, create, and edit course content but generally cannot delete content or publish/unpublish the course. Additionally, TAs do not have the ability to add or remove certain users, such as co-instructors, and their access to course settings is limited. While their permissions are more restricted than those of an instructor, TAs play a vital role in managing the course and supporting its smooth operation.
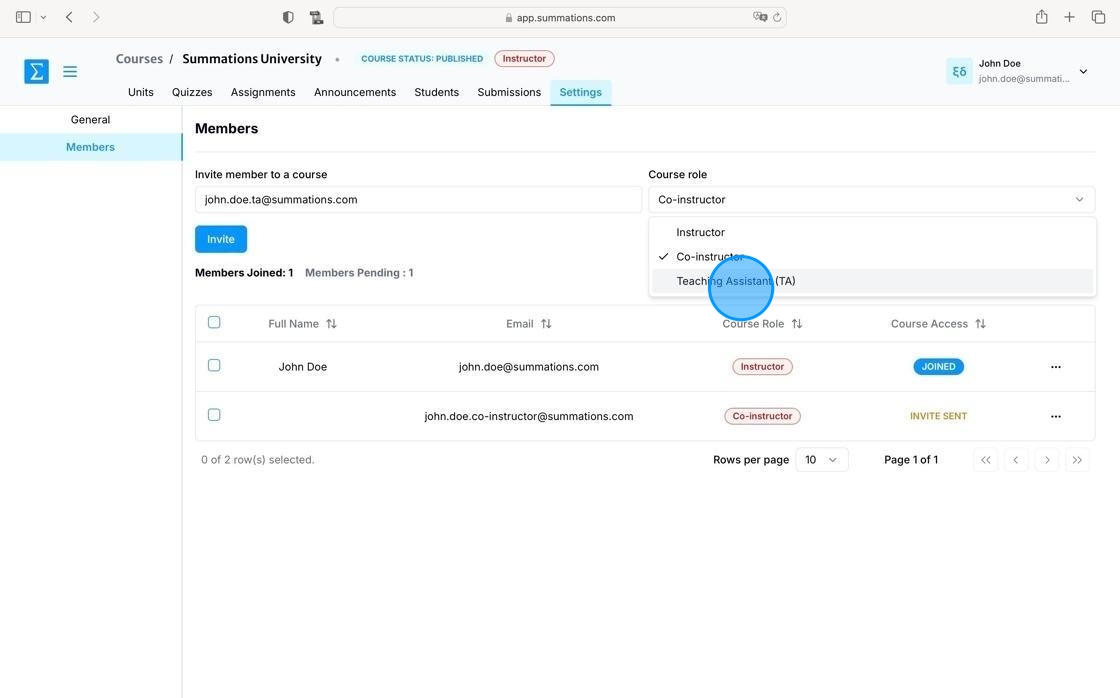
Enter your TA's email address and select 'TA (Teaching Assistant)' as their role.
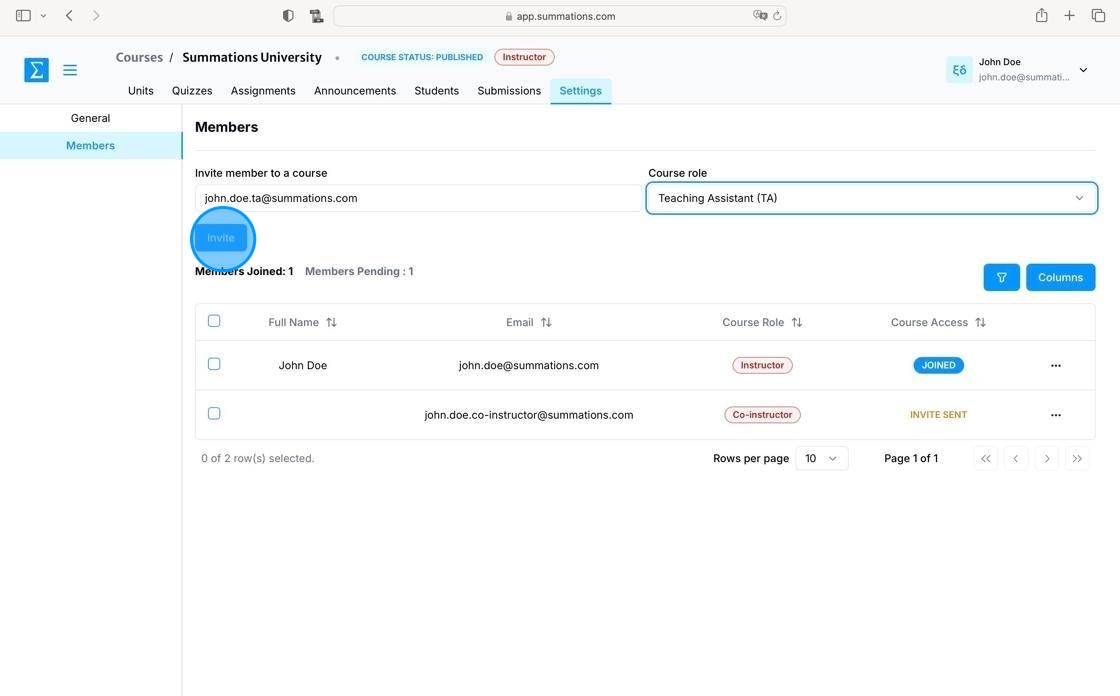
Click 'Invite.' This will automatically send an invitation email to your TA (Teaching Assistant).
Your invited TAs will appear under 'Members.' Initially, their status will display as 'Invite Sent.' Once they accept the invitation and join the course, their status will change to 'Joined.'

