Assignments Tab
The Assignments Tab serves as a central hub for all course assignments, helping both educators and students stay organized. Educators can create, schedule, and manage assignments while setting deadlines, providing instructions, and defining grading criteria. Students can view all their assignments in one place, with easy access to due dates, submission statuses, and any attached resources or instructions. The tab may also include filters for sorting assignments by course, due date, or completion status, enabling students to prioritize tasks and manage their workload efficiently.
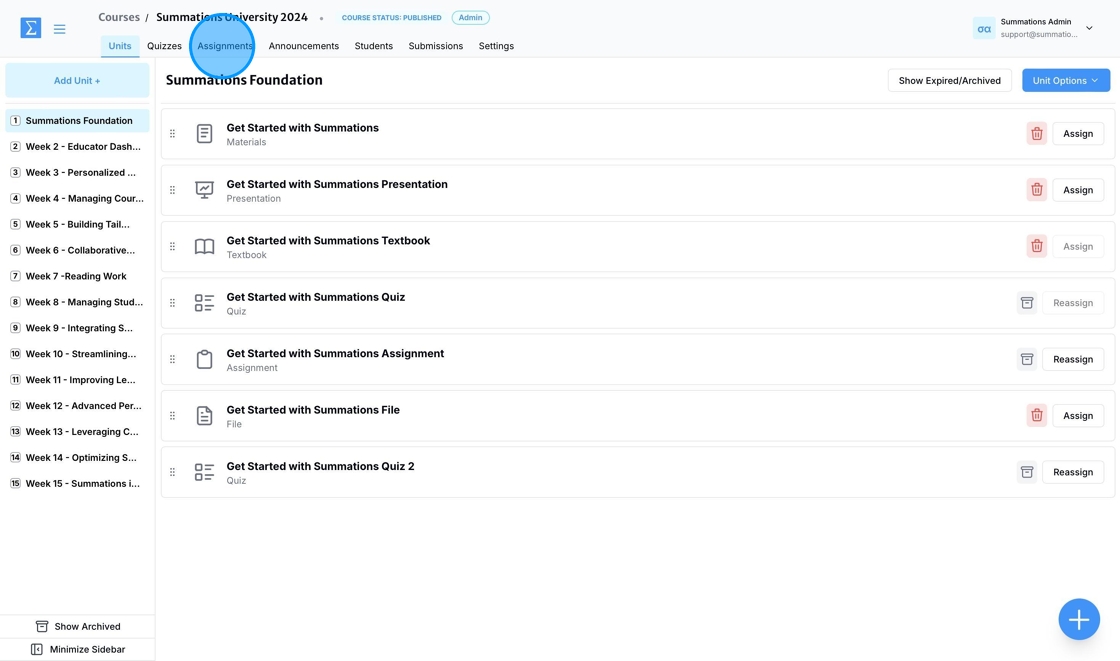
To view all the assignments you have created, click 'Assignments' tab.
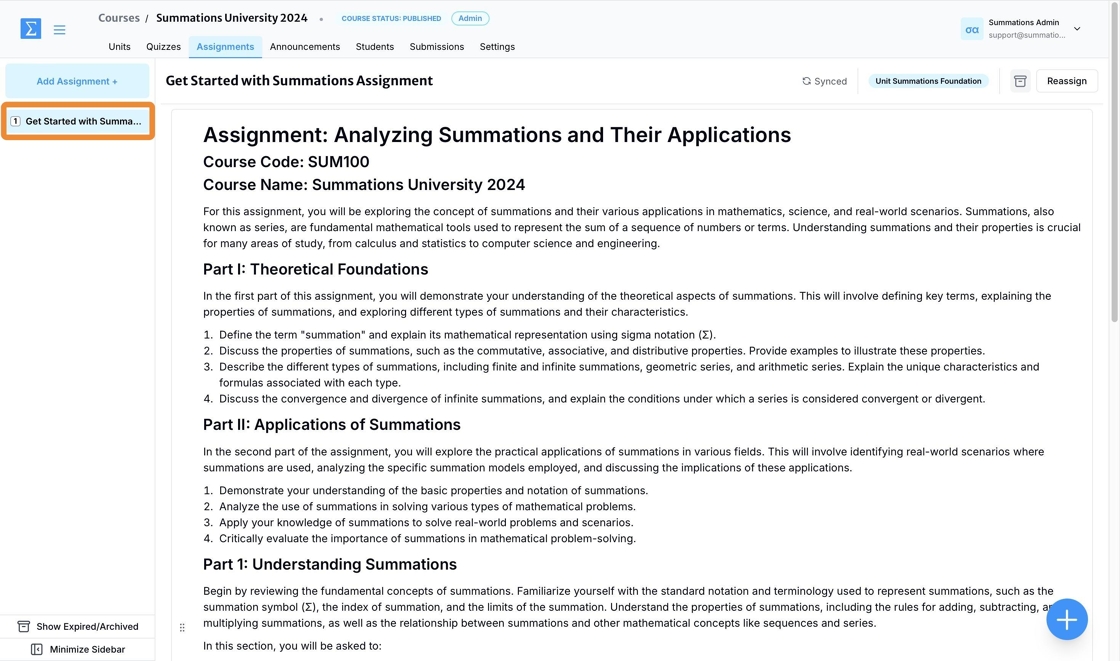
All the assignments you have created will be displayed on the screen and can be navigated by clicking through the sidebar.
Creating Assignments from the Assignments Tab
As an instructor, you can create assignments directly from the Assignments Tab, enabling seamless integration with your course materials and simplifying the management of assessments.
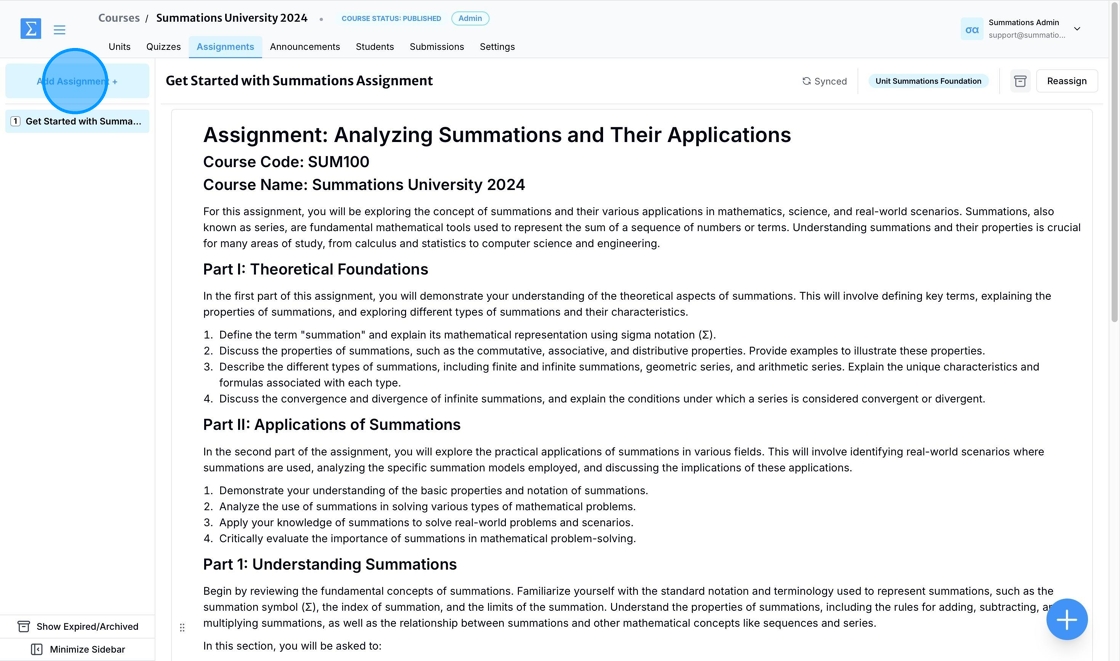
To create an assignment from the Assignments Tab, click the "Add Assignment +" button.
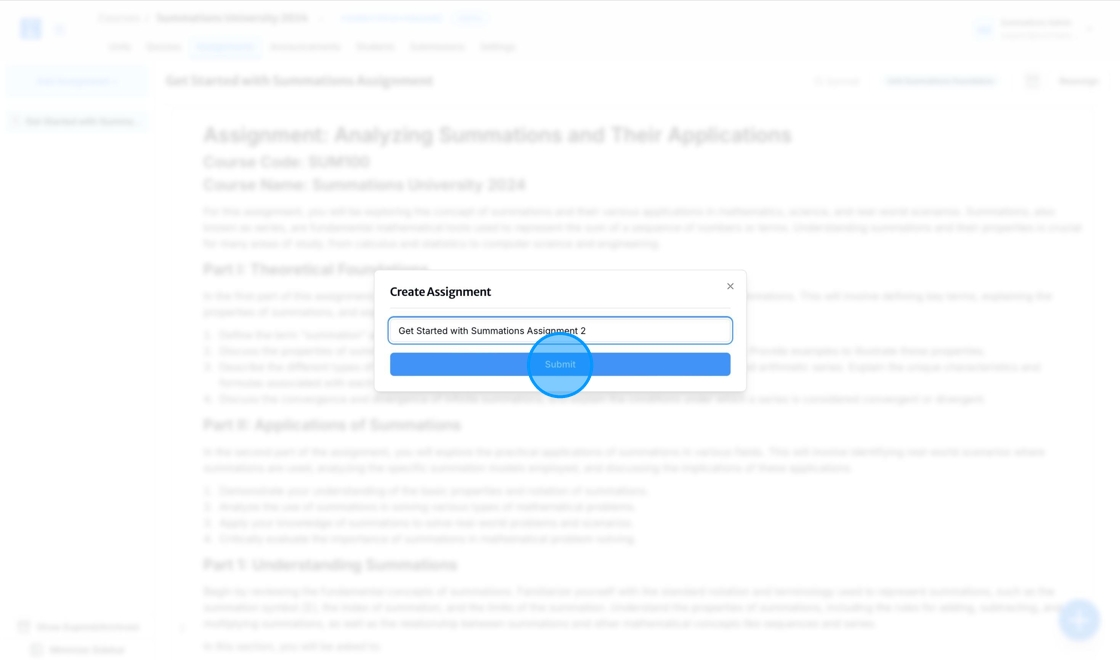
Enter the title of your assignment, then click 'Submit.'
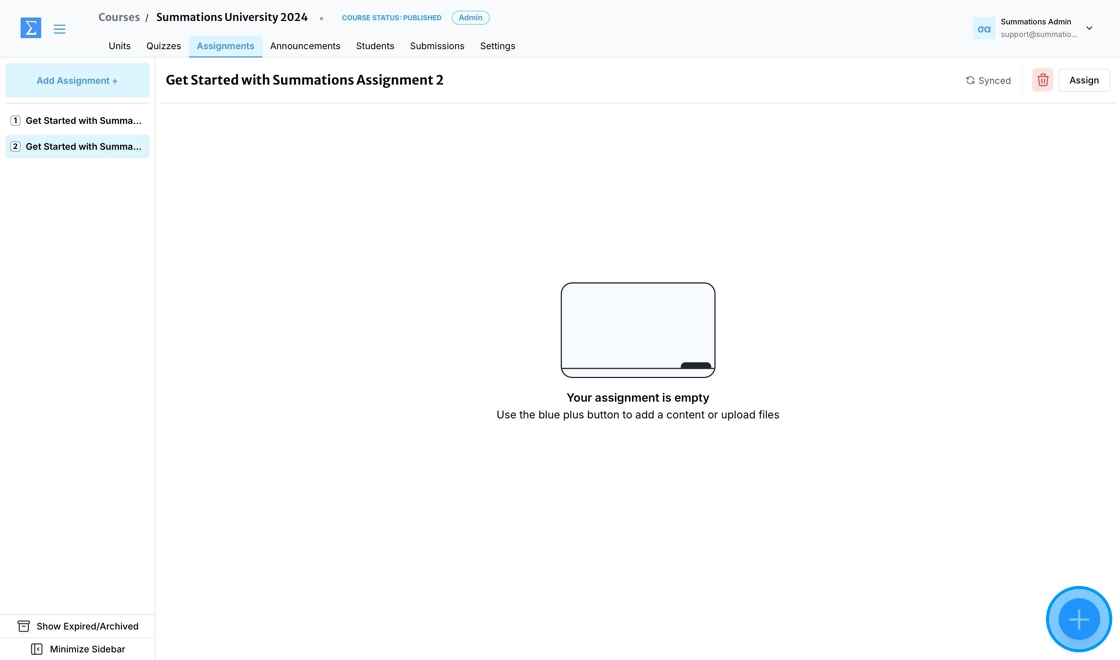
To start building your newly created assignment, click the '+' button in the bottom-right corner.
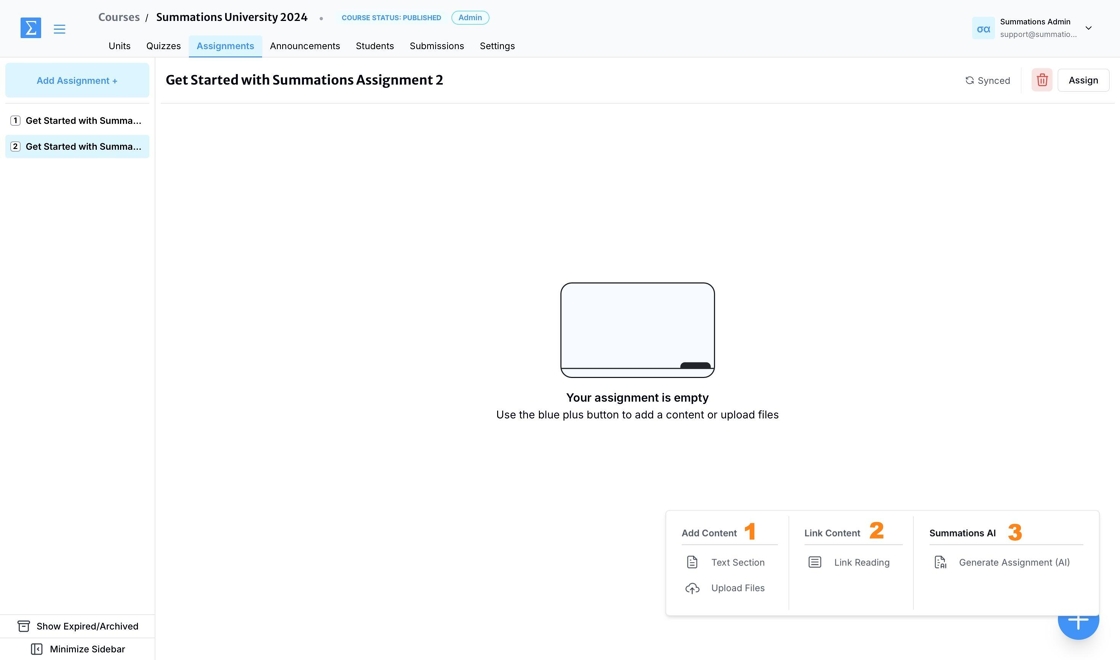
When you click the '+' button, you’ll see several options to design and organize engaging assignments:
1. Add Content
Text Section: Write and format text to provide instructions, guidelines, or context for the assignment.
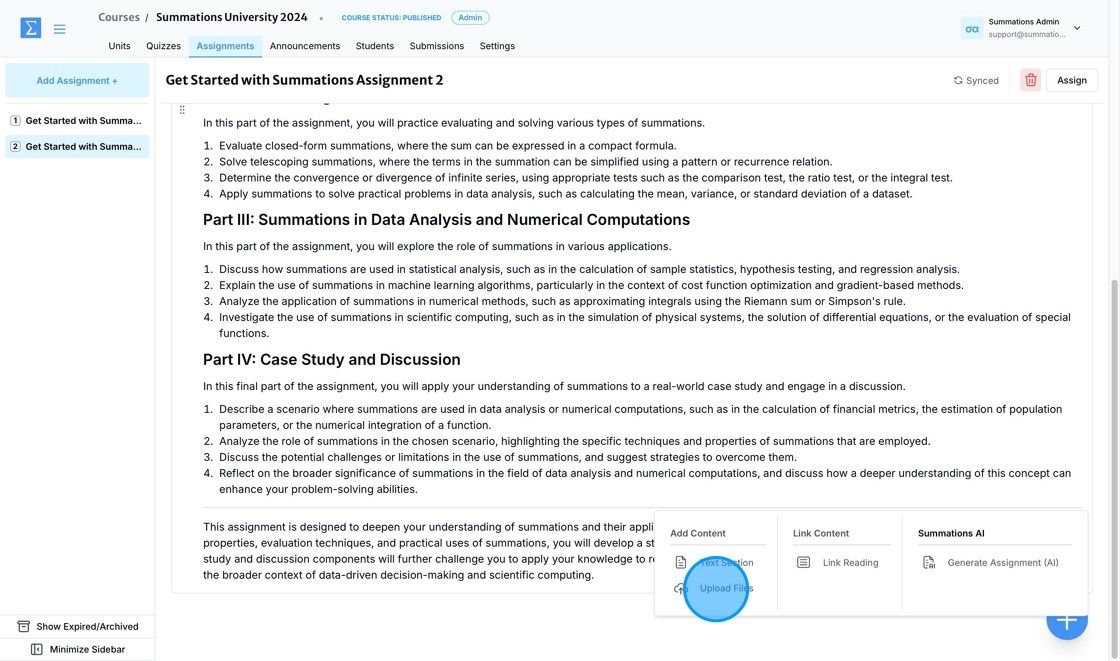
Upload Files: Attach resources such as PDFs, PowerPoint presentations, or Word documents to support the assignment.
2. Link Content
Link Reading: Connect readings from the Summations catalog or other curated resources to the assignment, offering students easy access to essential materials.
3. Summations AI
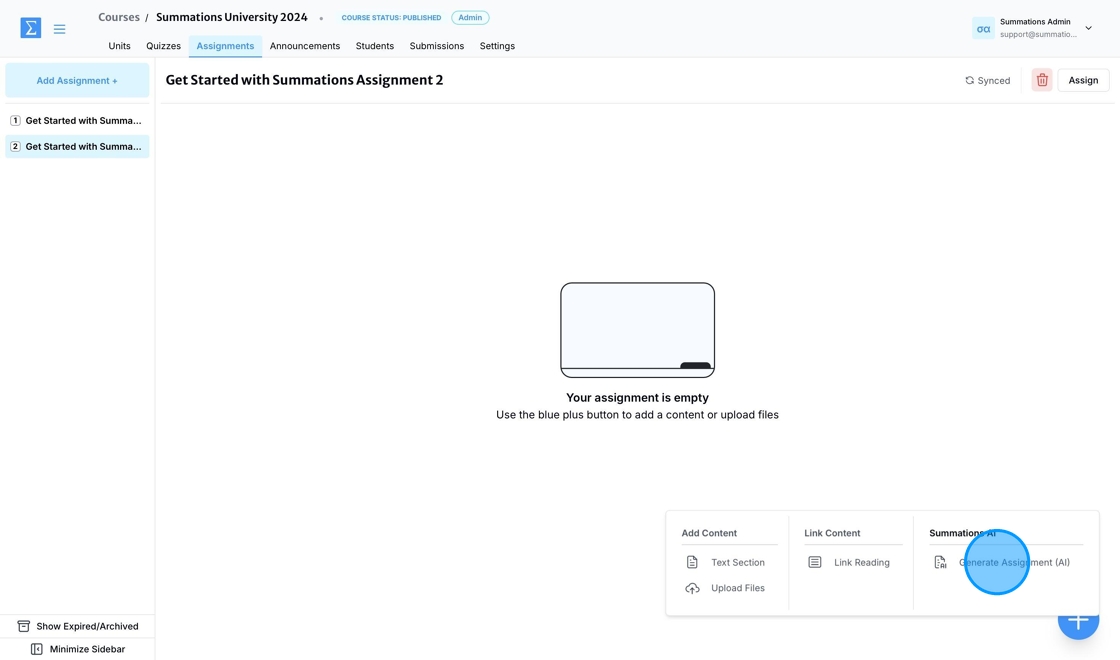
Generate Assignment (AI): Use Summations' AI to generate assignments based on existing content within the same unit, ensuring they align with the course's objectives and learning goals.
Add Assignment Instructions or Provide Additional Context Using Text Section
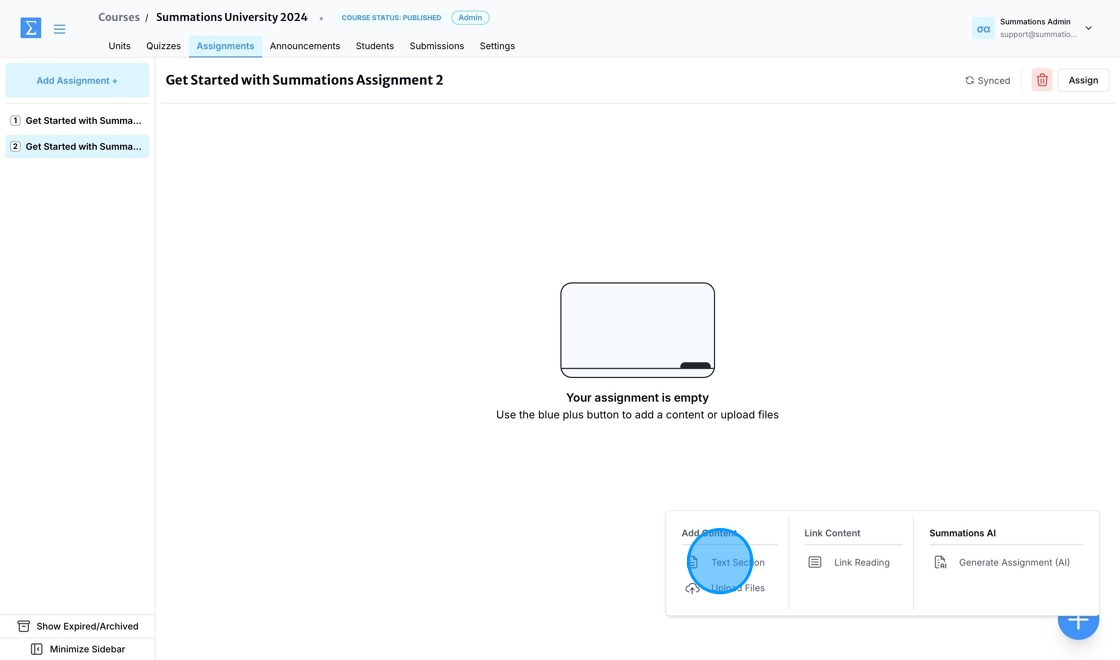
You can add text, such as a title, introduction, or instructions for your students, by clicking 'Text Section.'
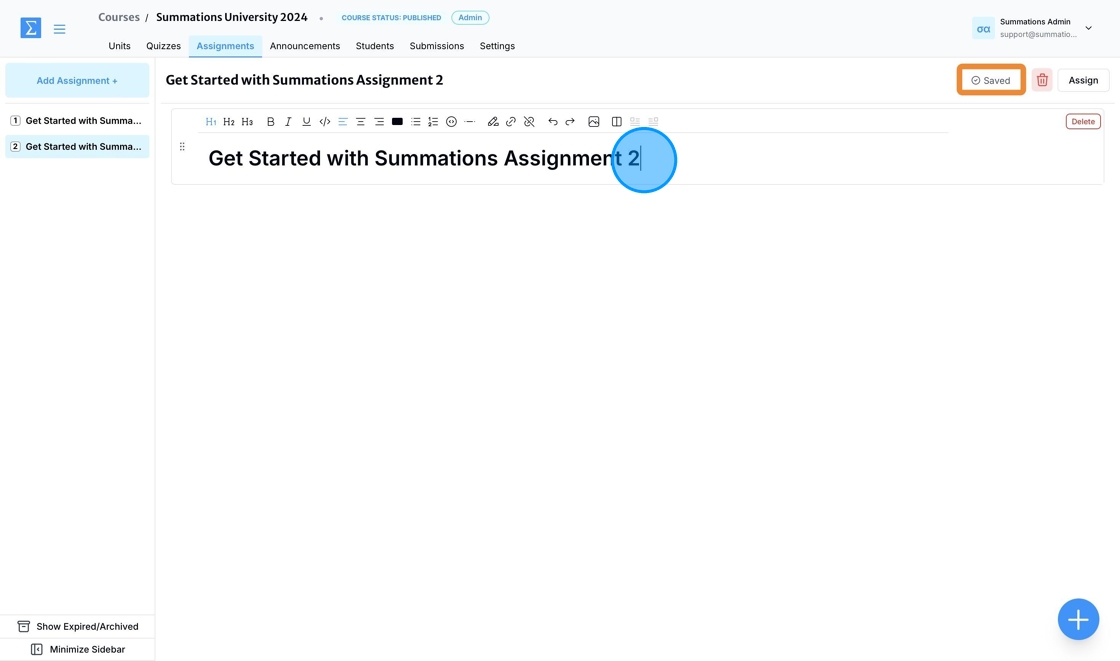
This will open a text editor where you can input, format, and structure your content. The text editor allows you to:
Use headings and subheadings to organize the material.
Add bullet points or numbered lists for clarity.
Apply text formatting options, such as bold, italics, or underline, to emphasize key concepts.
Insert hyperlinks to direct students to additional resources or references.
Include media resources such as images and videos.
Any content added under the Assignment section is automatically saved and synced to the cloud. You can view the saving status in the top-right corner.
Generate Assignment Using Summations AI
To use AI to generate an assignment based on the content you’ve created for the rest of the unit, click the '+' button and select 'Generate Assignment (AI).'
All generated assignments adhere to active learning principles and are intended to serve as inspiration for instructors when designing their assignments.
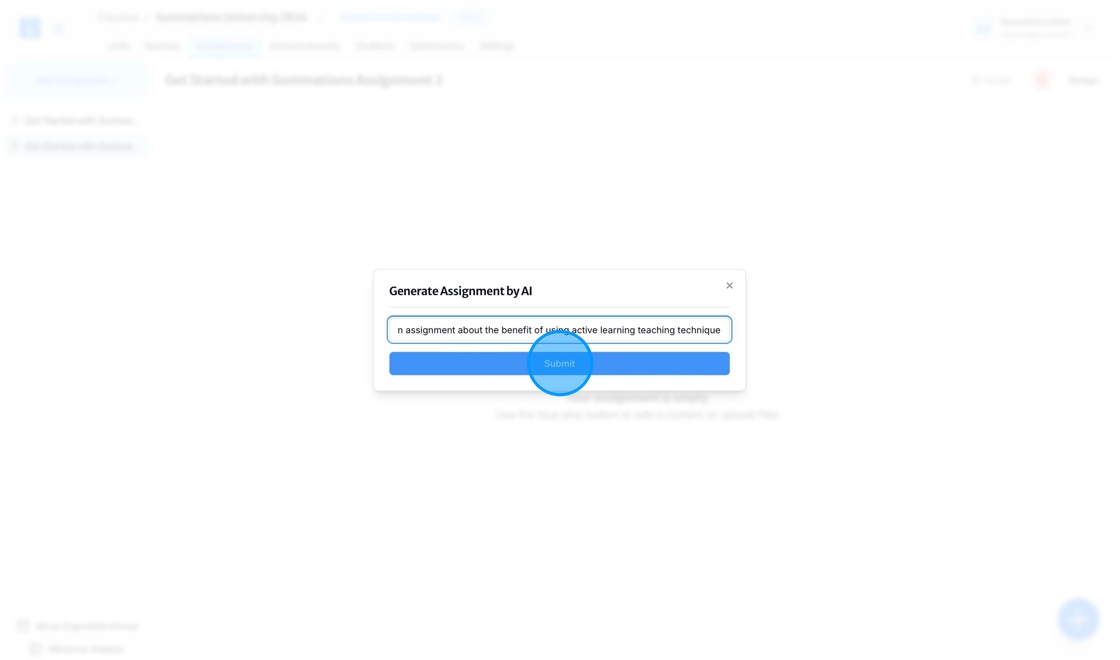
Enter the topic for this assignment and click 'Submit.' Please note that any AI-generated material on Summations takes into account all existing content in this unit, as long as it is relevant to the prompt you provide. In the 'Generate Assignment by AI' section, you can instruct the AI to generate an assignment on a specific learning topic covered in this unit or any other topic you want to quiz your students on.
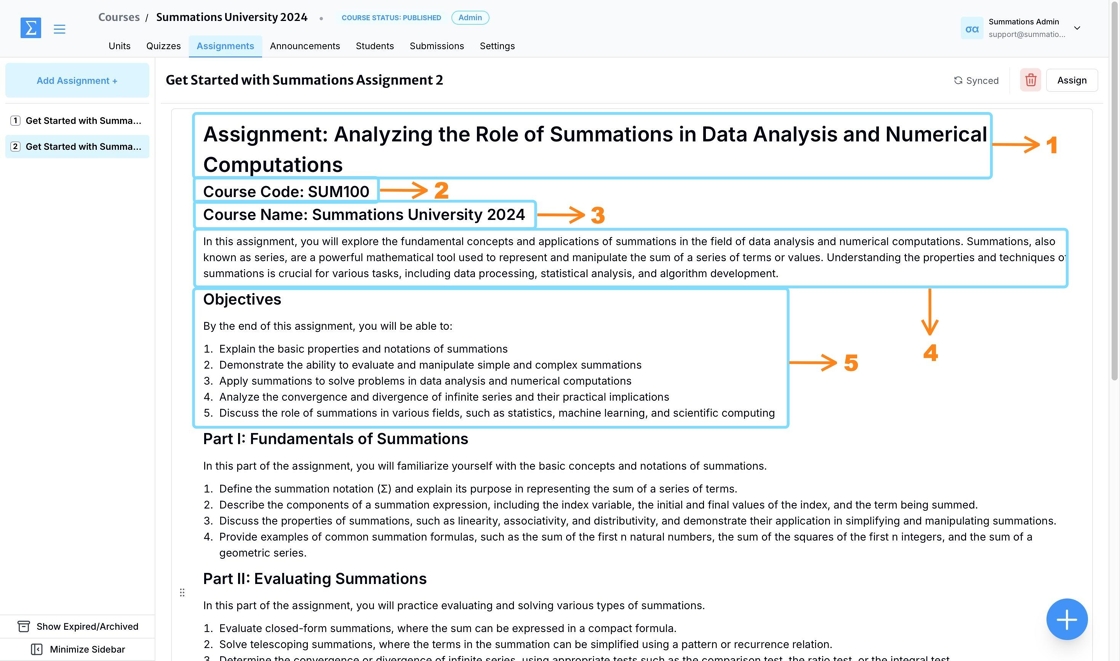
The generated assignment is organized based on existing materials in the unit, as well as any uploaded or selected source materials. Each assignment includes the following components:
Title: The assignment title appears prominently, clearly reflecting the focus or objectives of the task. This sets the context and informs students about the purpose of the assignment.
Course Code: The course code is included to provide clear identification and ensure the assignment is correctly associated with the specific course. This helps both instructors and students manage assignments across multiple courses efficiently.
Course Name: The name of the course is displayed alongside the course code to ensure the assignment is easily recognizable and linked to the correct class or module.
Assignment Introduction: The introduction provides students with a brief overview of the assignment, including its context, relevance, and connection to the course material. It sets the stage for the task, helping students understand what is expected and why the assignment is important for their learning journey.
Assignment Objective: This component clearly outlines the specific goals or learning outcomes of the assignment. It explains what students should aim to achieve upon completing the task, emphasizing the skills, knowledge, or competencies they will develop. The objectives serve as a guide for students to approach the assignment with focus and purpose.
Attach Resources to Support the Assignment Using Upload Files
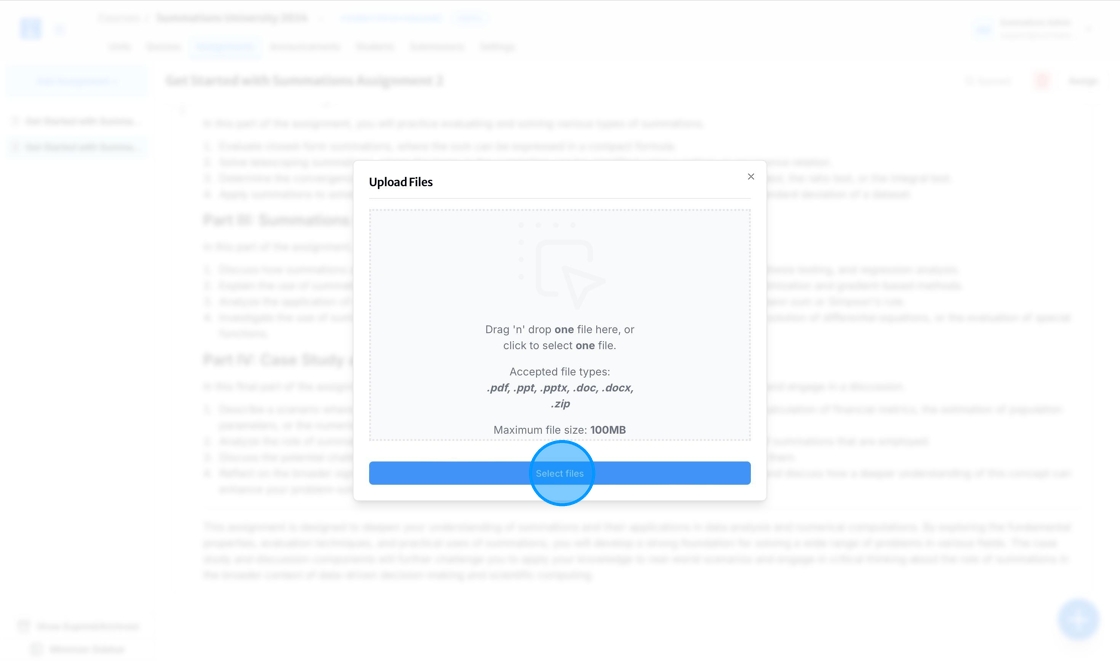
To attach a file, click the '+' button and select 'Upload Files.'
To upload a file, click "Select Files" or drag and drop the file into the upload box. The upload process will begin automatically.
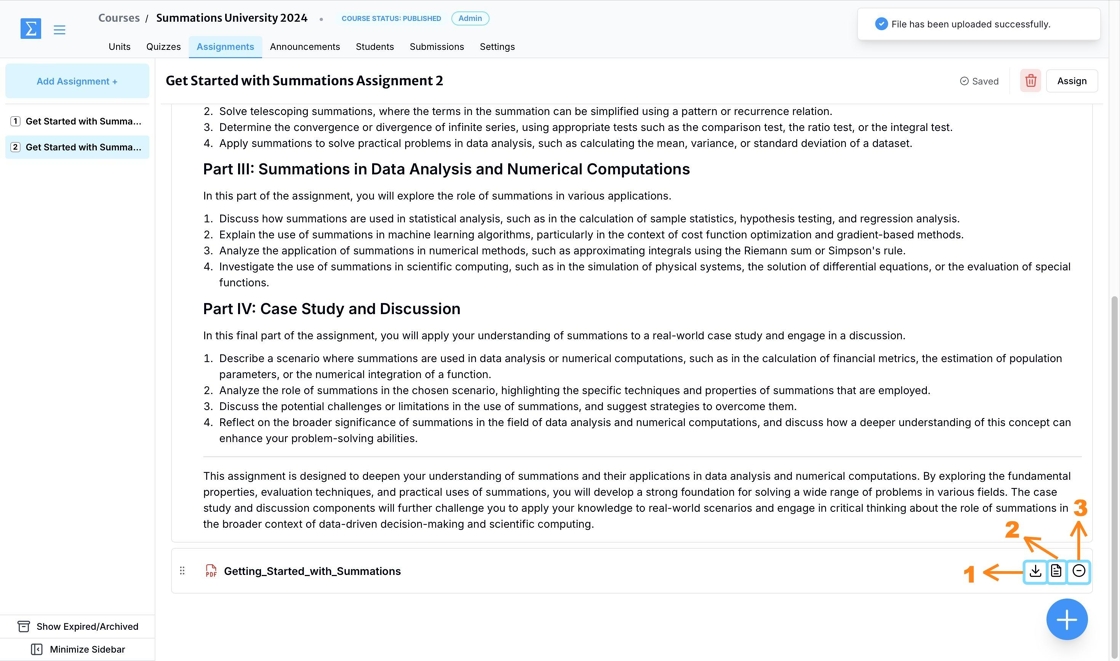
Once your file is uploaded, you can take the following actions to ensure it is ready for your students to access:
Download: Download the file to your local device if you need to review it offline or if the original file was accidentally deleted.
Read: Open the file in Summations Reader to read, review, or annotate it. You can add insights, share them with your students, or create a collaborative learning environment where students can engage with the material and work together. For more information about our Collaborative Insight Tool, please refer to this article "Scaffolding Tools To Support Students' Learning".
Delete: Remove the file if it is not a good fit for your students.
Linking Content Using 'Link Reading'
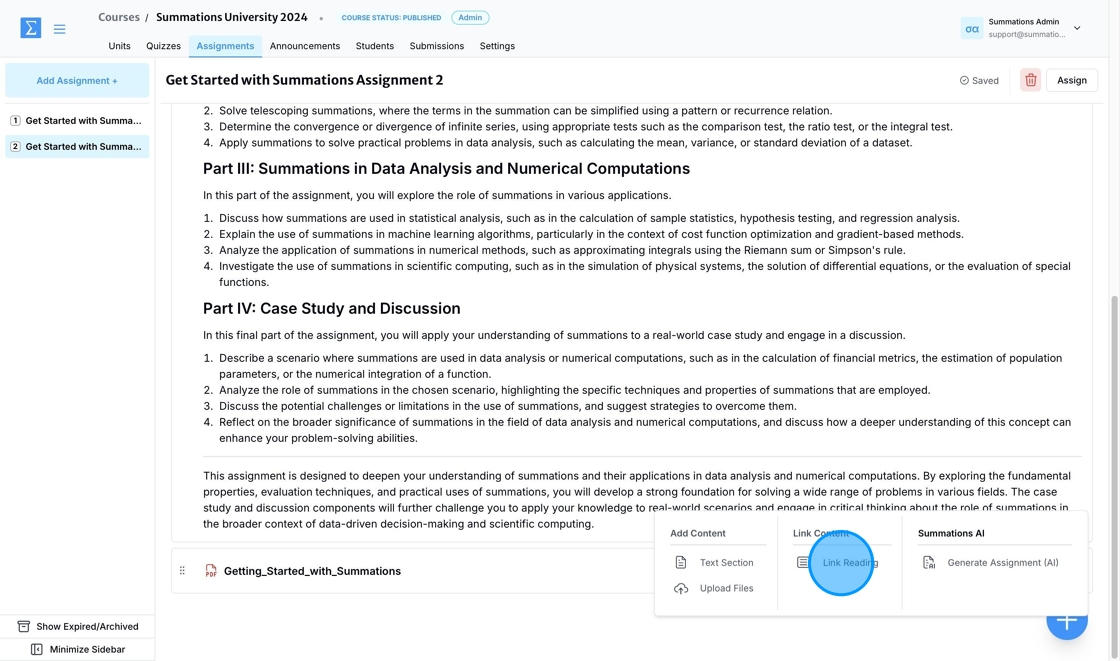
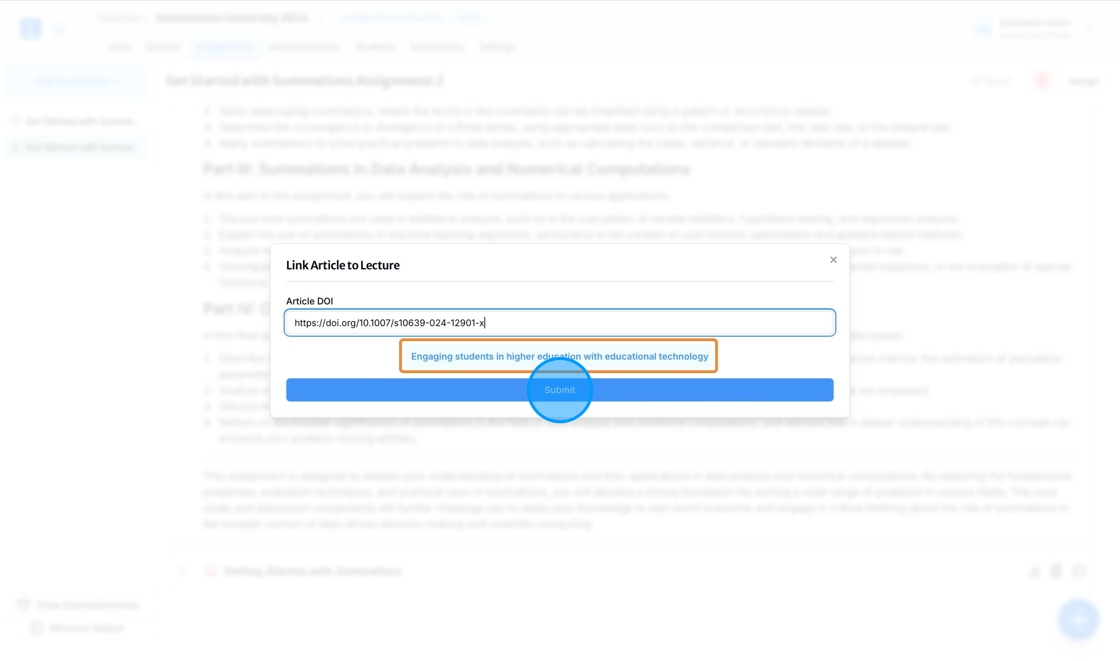
To link a reading to the assignment using its DOI, click the '+' button in the Assignment section and select 'Link Reading.'
After pasting the DOI, the title of the article will appear below if it is available in the Summations catalog. If the displayed title matches your desired article, click 'Submit.'
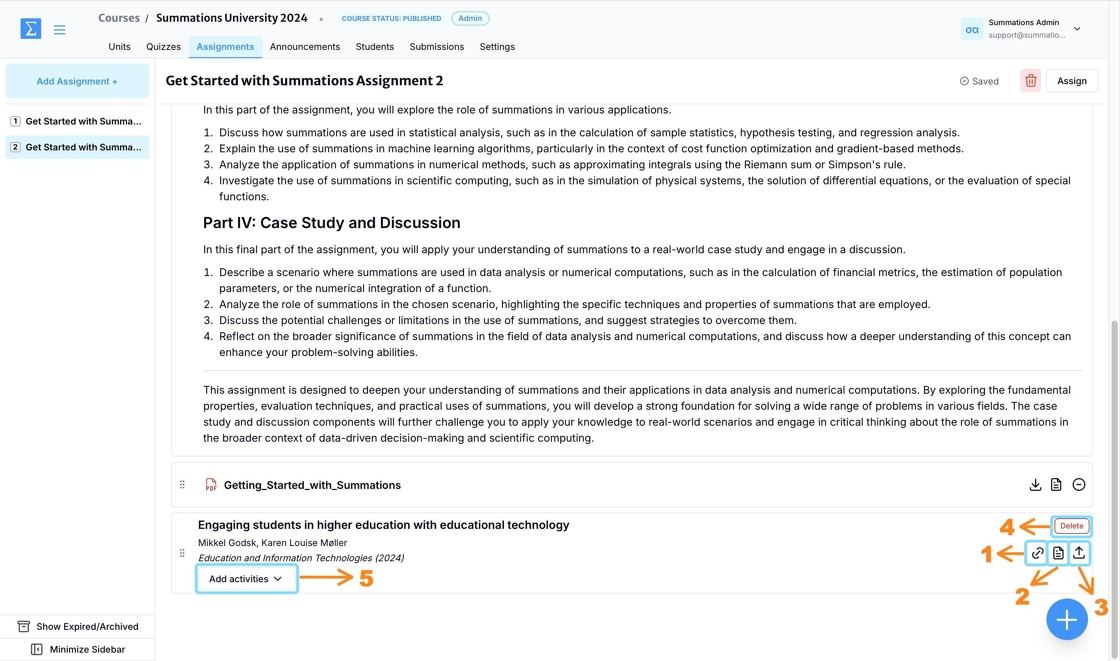
Once the reading is added, you can take the following actions to ensure it is ready to be assigned to students:
Link to Article Page in the Summations Catalog: Use this option to navigate directly to the article's page in the Summations catalog. Here, you can access high-level information about the publication, including details about the journal, author, abstract, AI-generated summary, a link to the publisher's website, and related publications.
Read: Open the reading in Summations Reader to read, review, or annotate it. Add insights, share them with your students, or create a collaborative learning environment where students can engage with the material and collaborate. For more information about our Collaborative Insight Tool, please refer to this article"Scaffolding Tools To Support Students' Learning".
Upload/Replace the Reading: If you prefer not to assign this reading to students and have your own file instead, you can upload or replace the current reading with your own material.
Delete: Remove the reading if it is not suitable for your students.
Add Activities: Assign activities directly linked to the reading for your students to complete. Activities can include comprehension questions, discussion prompts, or interactive tasks designed to deepen their understanding of the material. By embedding activities within the reading, you create opportunities for students to engage actively with the content, apply critical thinking skills, and reflect on key concepts.
Assign Assignment
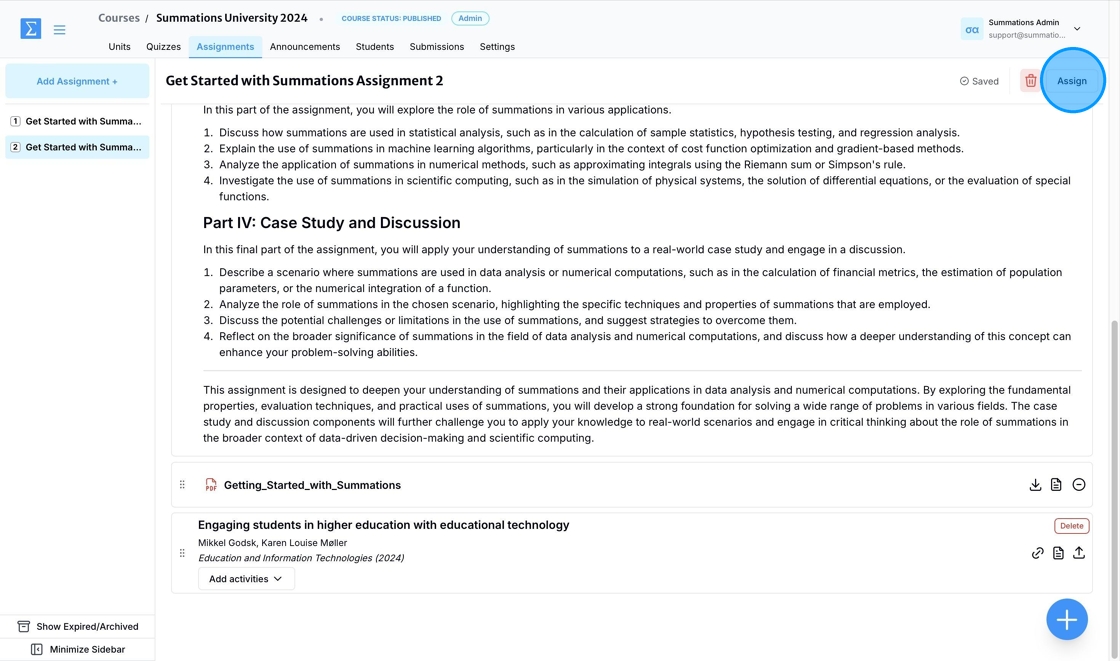
Once you have finished building your assignment and it is ready for students to access, click 'Assign' in the top-right corner of the assignment.
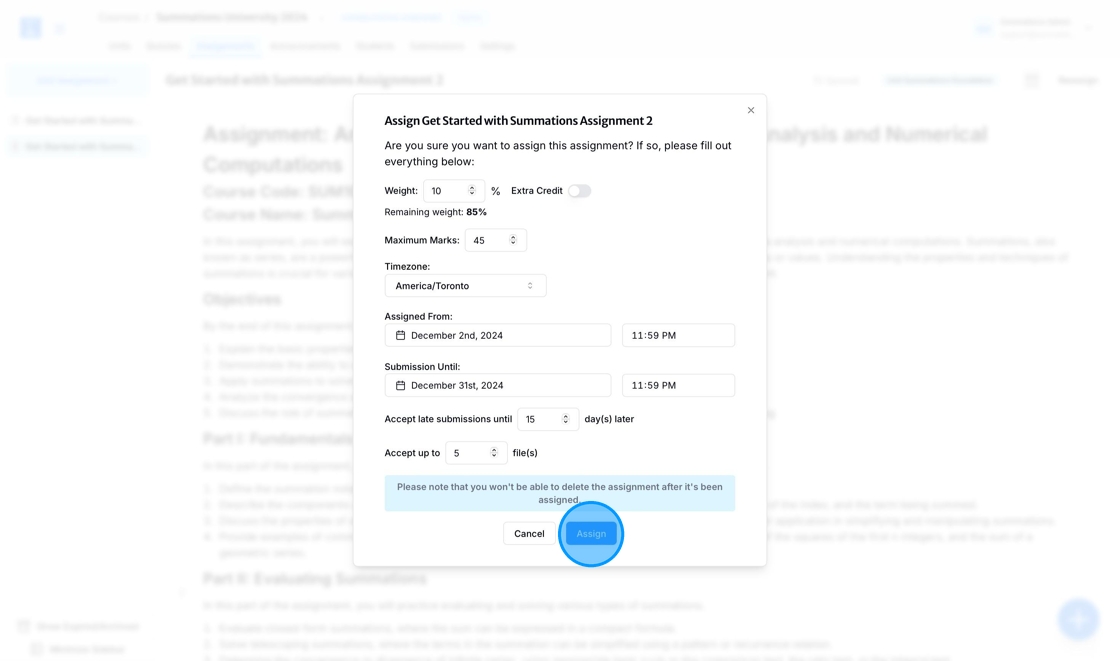
To assign your assignment, follow these steps:
Link to Unit: If you have created the assignment under the "Assignment" tab, use the "Link to Unit" section to associate the assignment with the appropriate unit. This step ensures that the assignment is properly aligned with the corresponding unit in your course structure.
Weight: Specify the weight of the assignment in relation to the overall course grade. This determines how much the assignment contributes to the final grade and ensures alignment with your course grading policy. Adjust the weight percentage as needed to reflect the assignment's importance relative to other assignments or assessments in the course.
Extra credit: Indicate whether the assignment should be assigned as extra credit. If selected, the points earned from the assignment will contribute to the student's overall grade without impacting the total possible points for the course. This option allows you to offer additional learning opportunities and incentives for students to engage with the material.
Maximum Marks: Set the total marks the assignment is worth. This value will help define the grading scale and indicate the maximum score students can achieve for this assignment.
Timezone: The timezone will default to your current timezone based on your computer settings. If you and your students are in different timezones and you want the assignment to align with your students' timezone, click the timezone field and select an alternative from the list.
Assigned From: To assign the assignment immediately, leave the 'Assigned From' field unchanged, as it defaults to the current time. If you want to schedule the assignment for a later time, click on the date and time field, select an alternative date from the calendar, and adjust the time accordingly.
Submission Until: Set the deadline for when the assignment will need to be submitted by selecting the appropriate date and time.
Accept Late Submissions: Indicate whether late submissions will be accepted and specify how many days after the deadline students can still submit the assignment. For example, if you choose to accept late submissions up to 3 days after the deadline, students can submit within that timeframe with or without penalties, as determined by your grading policy.
Accept File Submissions: Specify the maximum number of files students can upload for the assignment. For example, if you set the limit to 3 files, students will be able to upload up to three separate files for submission.
After completing these settings, click 'Assign' to finalize and make the assignment available to your students.
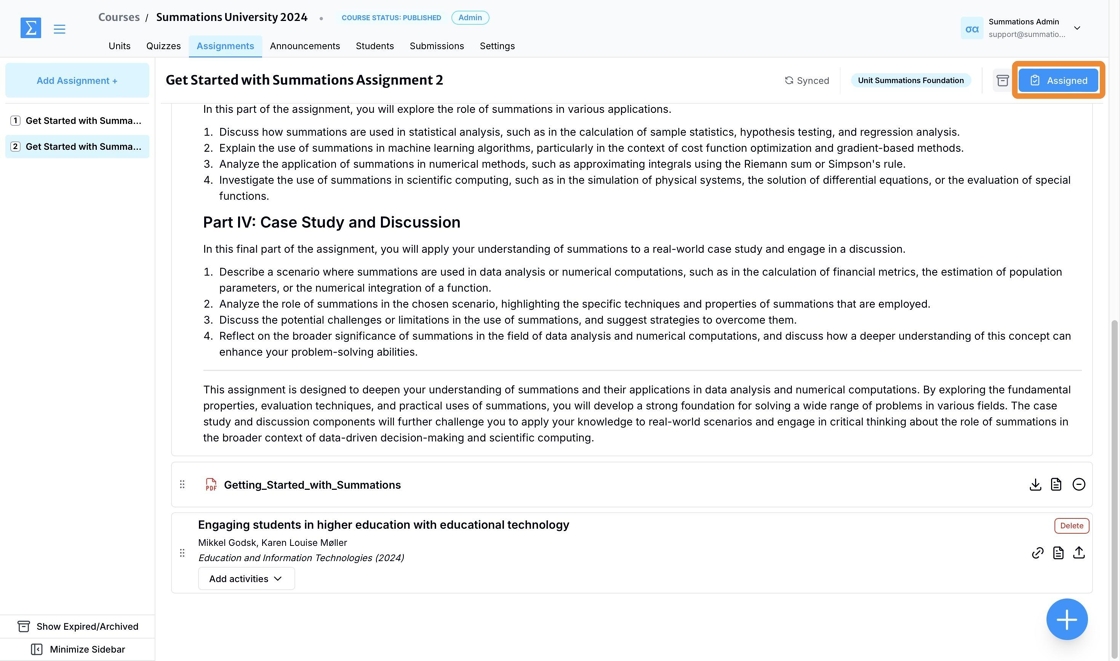
Once the assignment is assigned and becomes visible to your students, the 'Assign' button in the top-right corner of the assignment will change to 'Assigned.'
The assignment section within the unit to which this assignment is linked will update from 'Assign' to 'Assigned' to reflect the change.
To schedule the assignment for a later time, click the date and time field, select a different date from the calendar, and adjust the time as needed.
Once all fields have been updated, click 'Assign' to finalize the process.
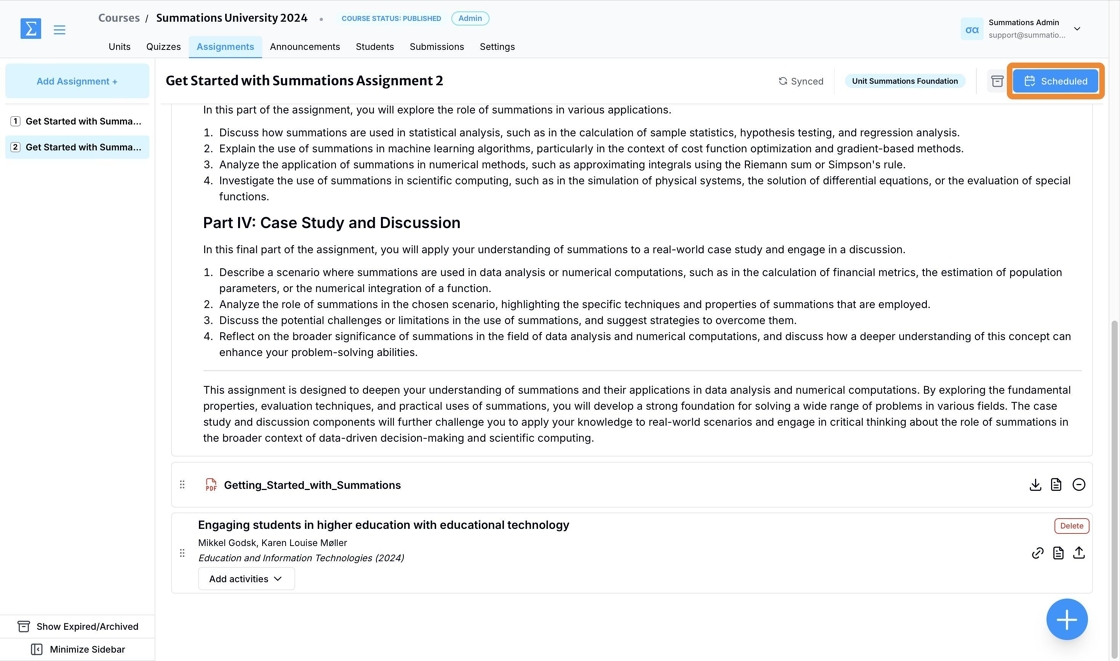
Once the assignment is scheduled for assignment, the 'Assign' button in the top-right corner of the assignment will change to 'Scheduled.' When the 'Assigned From' time arrives, the button will automatically update to 'Assigned.'
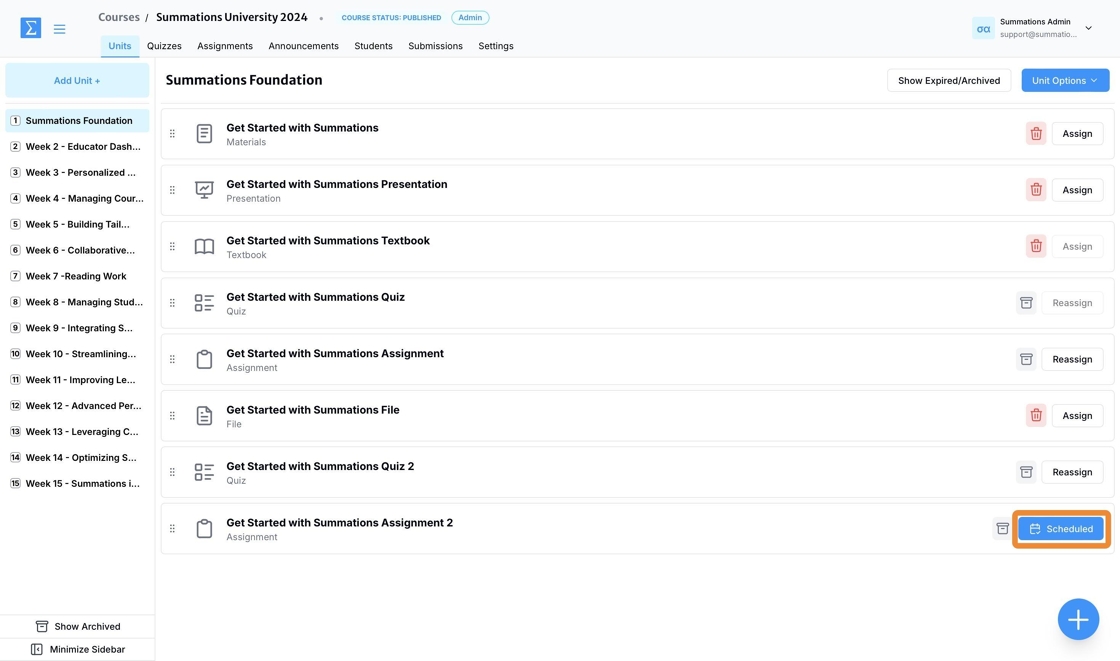
The assignment section within the unit to which this assignment is linked will update from 'Assign' to 'Scheduled' to reflect the change. When the 'Assigned From' time arrives, the button will automatically update to 'Assigned.'
Updating Assignment Details
As an instructor, you can update specific details of an assignment, such as the deadline, grade value, or assigned availability. These updates are reflected in real-time for students, ensuring they have access to the most accurate and up-to-date information. To make changes, navigate to the 'Assigned' or 'Scheduled' button in the top-right corner, select 'Edit,' adjust the necessary details, and save your updates.
This flexibility allows you to adapt the assignment to evolving course requirements or accommodate individual student needs while maintaining the integrity of the assessment. For significant edits to the assignment content or structure, refer to the guide below on how to unassign and reassign the assignment to avoid any potential confusion.
Unassigning an Assignment
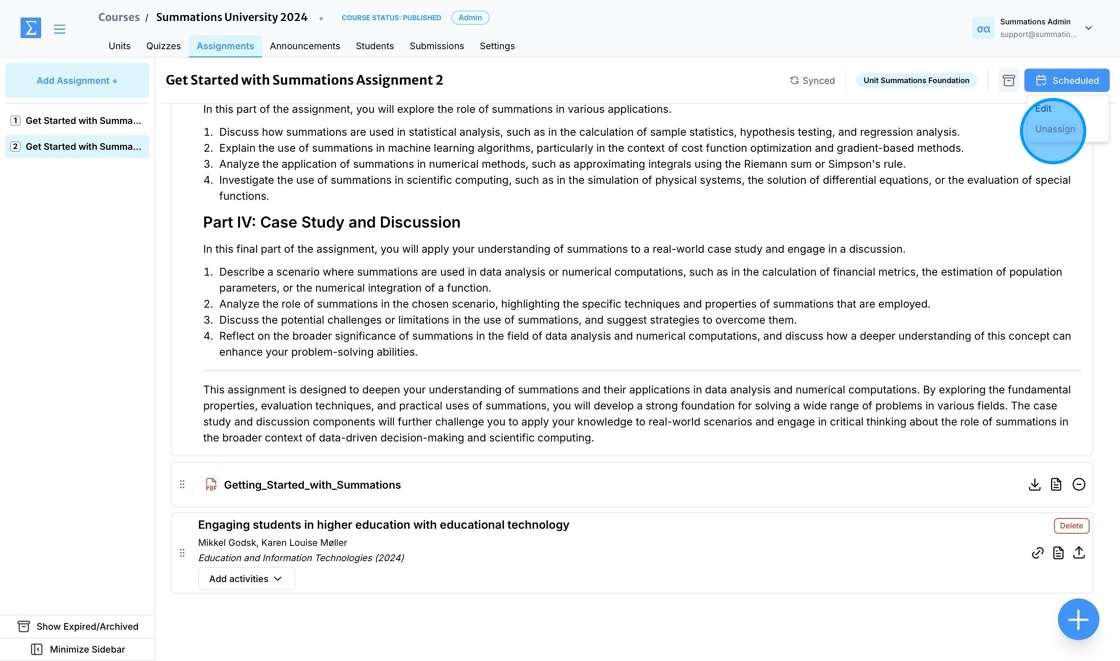
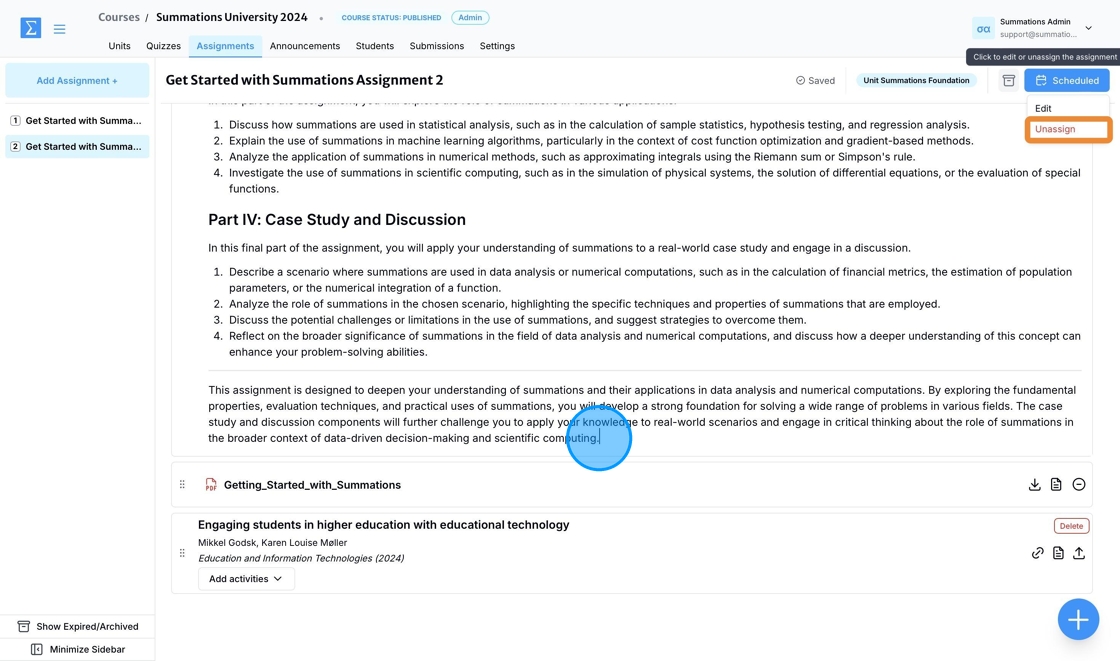
To unassign an assignment, click the 'Assigned' or 'Scheduled' button in the top-right corner and select 'Unassign.' This action will revoke access to the assignment and make it invisible to your students.
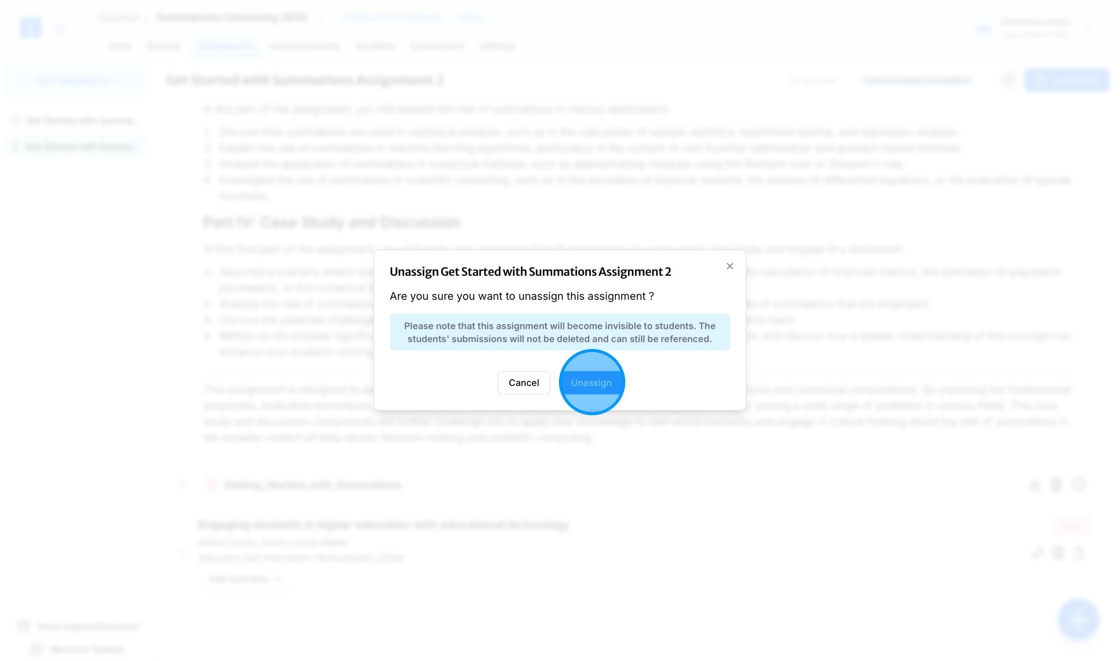
A confirmation pop-up will appear to prevent accidental unassigning of the quiz. Select 'Unassign' if you are certain you want to proceed.
Editing an Assigned Assignment
Once an assignment is assigned or scheduled, you can edit it without unassigning it by double-clicking on any component. Any changes made to the assignment while it is assigned will instantly reflect on the student side, as long as the assignment page is saved or synced as shown below.
To avoid unintended changes that could lead to confusion among students, we recommend that instructors first unassign the assignment, make the necessary edits, and then reassign it once the changes are finalized. For more information, please refer to the guidance above.
Reassigning an Assignment
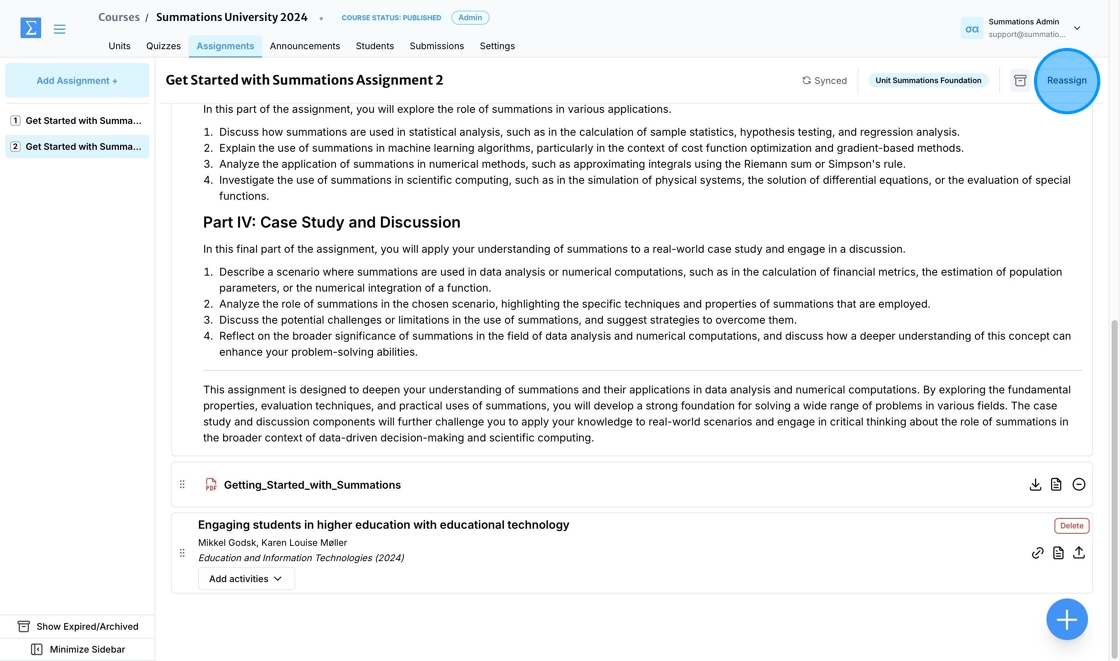
If you have unassigned an assignment for editing and now wish to reassign it to your students, click the 'Reassign' button in the top-right corner. Review and edit all details as needed, then click 'Assign' to finalize and make the assignment available to your students.

